
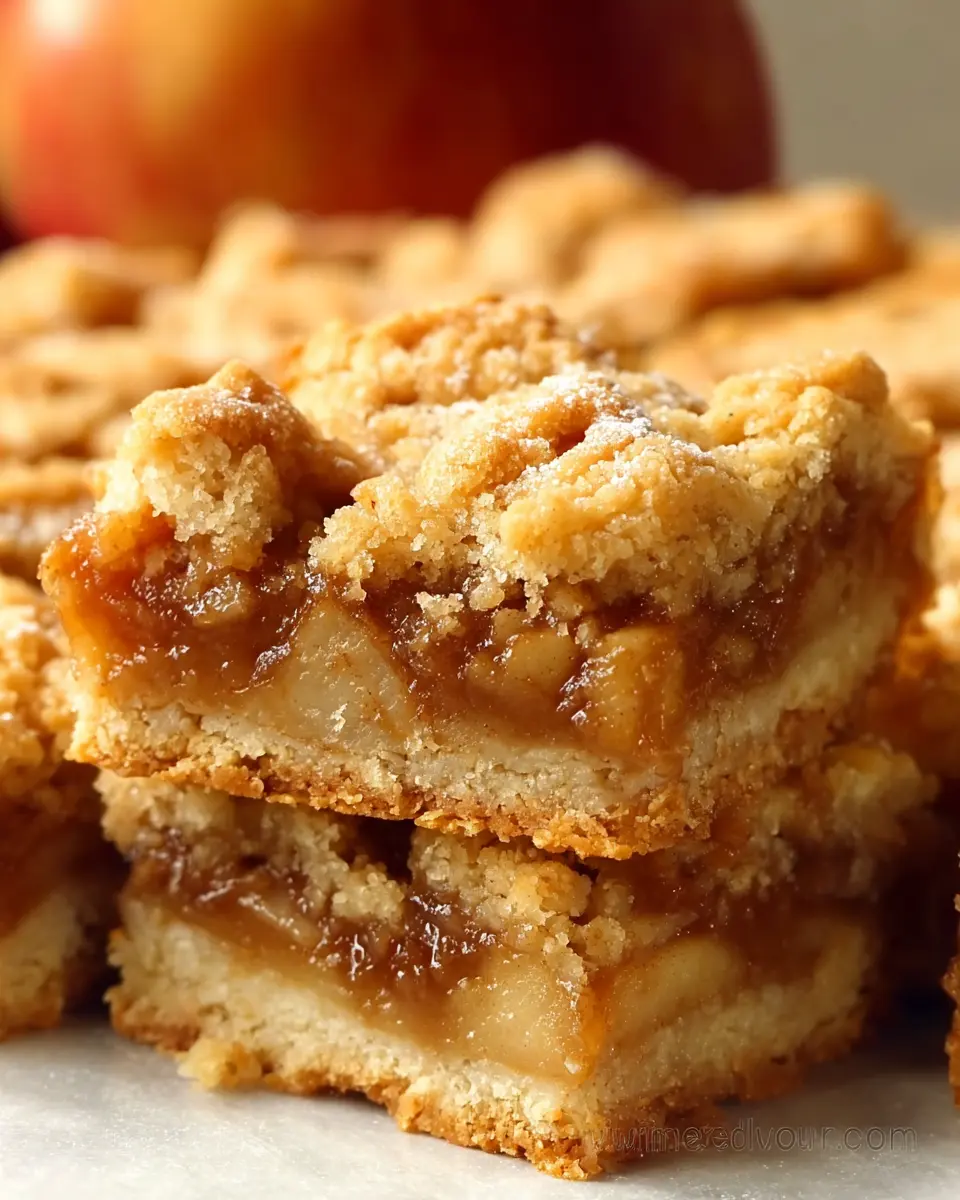
Introduction to Apple Pie Bars Recipe
When it comes to desserts, apple pie bars are a clever, trendy twist on the classic pie that offer a satisfying taste and an effortless way to indulge your sweet tooth. These bars are not only delicious but also incredibly convenient—especially for busy young professionals like you. After a long day at work, the last thing you want to do is spend hours in the kitchen. With just 20 minutes of prep time and a total of 75 minutes, you can create this delightful treat that’s perfect for sharing with friends or enjoying solo.
Why are Apple Pie Bars a Perfect Dessert for Young Professionals?
Apple pie bars are the epitome of quick, crowd-pleasing desserts. They’re versatile, allowing you to whip them up for potlucks, office parties, or cozy nights at home. Unlike traditional pies, they don’t require extensive baking skills or fancy techniques. The shortbread crust doubles up as the base and crumble, making assembly a breeze. Plus, these bars can be stored easily in the fridge for up to four days or even frozen for future cravings!
So, why not give this apple pie bars recipe a try? It's not just about flavor; it’s about bringing a little warmth and nostalgia into your busy life. Check out how easy it is to churn out these beauties!
Ingredients for Apple Pie Bars
Essential Ingredients for the Apple Filling
Creating the perfect apple filling is a crucial step in this Apple Pie Bars Recipe. Here’s what you’ll need:
- Apples: About 4 medium-sized apples (550g), peeled, cored, and chopped into cubes. Opt for a mix of sweet and tart varieties for balanced flavor.
- Granulated Sugar: You’ll need 2 tablespoons (30g) to enhance the natural sweetness of the apples.
- Flour: Use 2 tablespoons and 1 teaspoon (25g) to help thicken the filling. Cornstarch can be a great alternative; just use 1 tablespoon instead.
- Lemon Juice: 2 teaspoons brighten the flavor and prevent browning of the apples.
- Spices: A teaspoon of ground cinnamon and a pinch of ground nutmeg will add warmth and depth.
Must-Have Components for the Crust and Crumbles
The crust and crumble topping is where you can showcase your baking skills in this Apple Pie Bars Recipe. Here's what you’ll gather:
- All-Purpose Flour: You’ll need 280g (2 cups) to form a sturdy base. For measuring tips, check out this guide.
- Unsalted Butter: 185g (¾ cup and 1 tablespoon), chilled and cut into cubes, is key for that flaky texture.
- Granulated Sugar: Adding ½ cup (105g) sweetens the crust and crumbles beautifully.
- Cinnamon: Just 1 teaspoon enhances the flavor and complements the apple filling perfectly.
With these essential ingredients, you’ll be well on your way to whipping up some delightful apple pie bars that everyone will love!
Preparing Apple Pie Bars
Making apple pie bars is not just about the delicious end result; it's also about the joy of preparing something special in your kitchen. With just a few steps, you’ll have a delightful dessert that captures the essence of homemade apple pie. Let’s dive into the process of creating these sweet treats!
Step 1: Preheat the oven and prepare the baking dish
First things first—preheat your oven to 350°F (177°C). This is crucial for achieving that perfect golden brown crust. While the oven heats up, take an 8-inch square baking dish, grease it with some butter, and line the bottom and sides with parchment paper. Leave a bit of overhang (about 2 inches) on each side, as this will help you lift out the bars once they’re baked. Trust me, this small step will save you from potential mess later on!
Step 2: Create the apple filling mixture
Now, it’s time to work on the star of the show—the apple filling! Peel, core, and chop about 4 medium apples into small cubes. Toss the chopped apples in a medium bowl with lemon juice, granulated sugar, all-purpose flour (or cornstarch if you prefer), ground cinnamon, and nutmeg. This simple mixture not only brings out the natural sweetness of the apples but also adds a warm, fragrant aroma that will make your kitchen feel like autumn. Set this bowl aside while you prepare the crust.
Step 3: Make the crust and crumbles
In a large bowl, combine flour, sugar, and cinnamon. Add the cold, cubed butter and use a pastry blender, two forks, or your fingertips to cut the butter into the flour mixture until it resembles coarse crumbs. The cold butter ensures a flaky texture, just like your favorite pie crust. You're allowed to get a little messy here—embrace the process!
Step 4: Assemble the apple pie bars
Here comes the fun part! Spread about two-thirds of the buttery mixture into your prepared dish. Use a spoon (flour it lightly to avoid sticking) or your hands for this step. Next, layer on the apple mixture evenly. Crumble the remaining dough over the apples—make those crumbles as big or small as you like. Your apple pie bars will look great with a beautiful topping!
Step 5: Bake to perfection
Slide your assembled apple pie bars into the oven and bake for about 55 minutes. Keep an eye out for that golden-brown color on the top, which signals that your dessert is almost ready. Once baked, allow it to cool completely before slicing—this will make cutting into perfect bars much easier. The warming scent that fills your kitchen during baking will be the cherry on top of your baking experience!
With this guide, you're all set to create delectable apple pie bars that will impress friends and family alike. Enjoy the process and the tasty results!

Variations on Apple Pie Bars
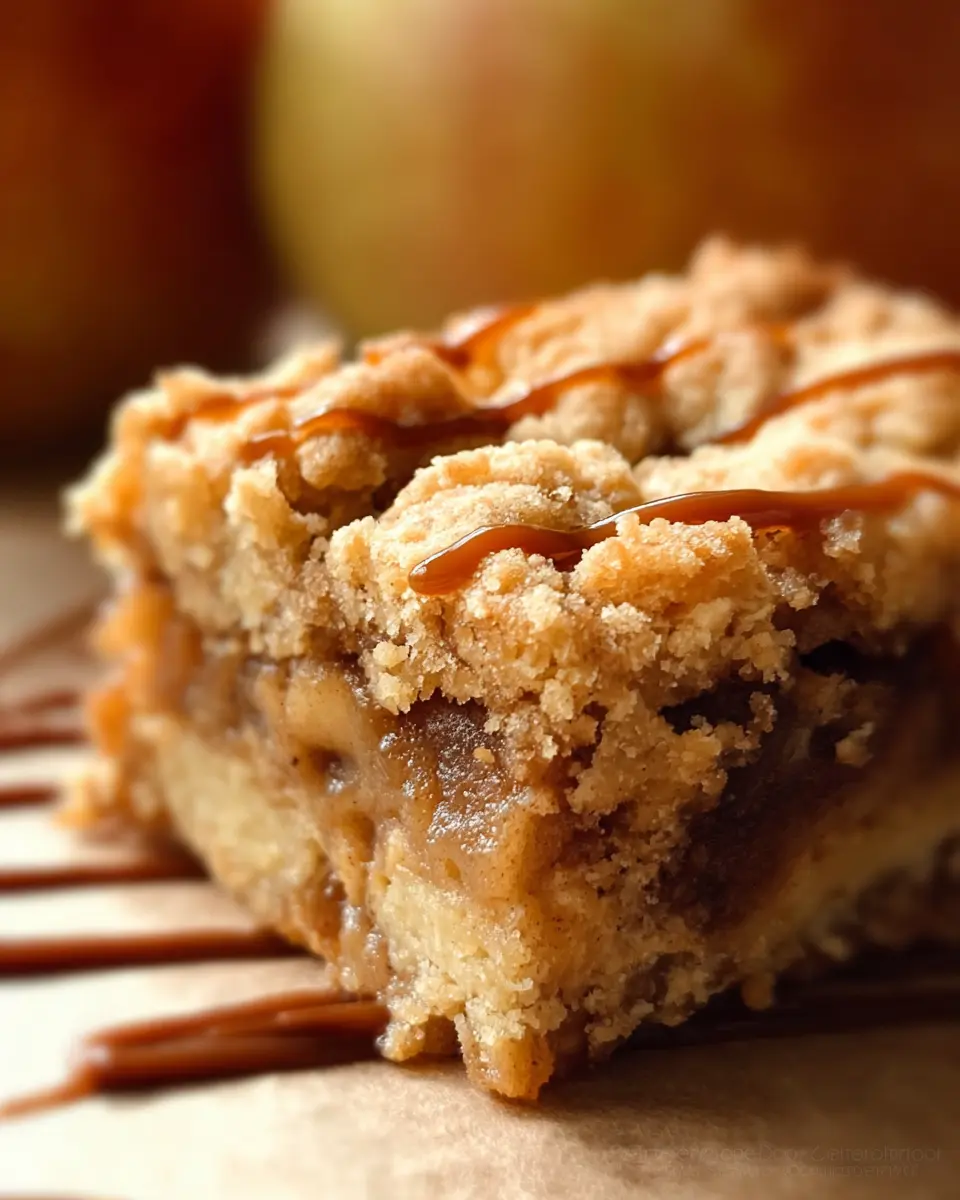
Apple Pie Bars with Caramel Drizzle
Elevate your Apple Pie Bars Recipe with a luscious caramel drizzle that adds a sweet twist! After baking your bars and allowing them to cool, melt some caramel candies or use store-bought caramel sauce. Drizzle generously over the top for a beautiful presentation and a delightful flavor addition. Not only does it enhance the sweetness, but the gooey texture pairs perfectly with the crunchy crumbles. Serve these indulgent treats at gatherings, or enjoy them solo—either way, they’re bound to impress!
Gluten-Free Apple Pie Bars Option
For those following a gluten-free lifestyle, transforming this recipe is simple! Swap out the all-purpose flour for a gluten-free flour blend in both the crust and the filling. Many blends work beautifully and can be found at local grocery stores or online. Additionally, ensure that all other ingredients, such as oats and baking powder, are certified gluten-free. You won't miss the gluten in these delicious apple pie bars, and everyone will appreciate the thoughtful option. Share this tasty treat with friends, regardless of their dietary preferences!
For more gluten-free baking tips, check out resources like Gluten-Free Living.
Cooking Tips and Notes for Apple Pie Bars
Tips for Selecting the Best Apples
Choosing the right apples is crucial for your Apple Pie Bars Recipe. Opt for a mix of tart and sweet apples like Granny Smith and Honeycrisp for a balanced flavor. Make sure the apples are firm, without bruises or soft spots. A quick tip? You can check for freshness by holding them in your hand; they should feel solid and heavy for their size.
Best Practices for Cutting and Handling Butter
For the perfect crunchy crust and crumble, using cold butter is essential. Keep your butter in the fridge until you're ready to cut it into small cubes. This ensures a flaky texture. When mixing, either use a pastry cutter or your fingers, gently working it into the flour until pea-sized crumbles form. Remember, the less you handle the butter, the flakier your crust will be!
By following these simple tips, you’ll elevate your Apple Pie Bars to the next level! For more information on how to select quality produce, check out this guide on selecting apples.
Serving suggestions for Apple Pie Bars
Pairing with ice cream or whipped cream
One of the best ways to enjoy your Apple Pie Bars is with a scoop of vanilla ice cream or a dollop of whipped cream. The creaminess of ice cream perfectly complements the warm, spiced apple filling, creating a delightful contrast of flavors and textures. Consider using homemade whipped cream for an extra touch, or experiment with flavors like caramel or cinnamon to elevate the experience.
Creative ways to serve apple pie bars at gatherings
When hosting a gathering, showcase your Apple Pie Bars as part of a dessert platter. You can accompany them with fresh fruit, nuts, and gourmet cheeses to create a beautiful, rustic spread. For added flair, drizzle caramel or chocolate sauce over the bars or serve them with a variety of dips, like butterscotch or orange zest, allowing guests to customize their experience. These creative serving suggestions will surely impress!
For more delightful ideas, check out Epicurious for additional dessert inspiration.
Time breakdown for Apple Pie Bars
Preparation time
Give yourself about 20 minutes for preparation. This includes peeling and chopping the apples, mixing the filling, and combining the shortbread dough for the crust and crumbles. Planning your time like this makes the cooking process smooth and enjoyable!
Cooking time
The cooking time is approximately 55 minutes. Bake your apple pie bars until they're golden brown and the crumbles are crunchy. The kitchen will smell amazing, adding to the excitement of this classic dessert.
Total time
In total, you'll spend around 1 hour and 15 minutes making these delicious apple pie bars. It’s a perfect way to spend an afternoon, and the reward is absolutely worth it when you taste the final result!
If you’re interested in more tips for prepping your kitchen or efficient cooking techniques, check out resources from The Kitchn and Serious Eats.
Nutritional Facts for Apple Pie Bars
When enjoying these homemade Apple Pie Bars, it's always good to be mindful of their nutritional values. Here's a quick breakdown of their key components:
Calories
These delightful bars contain approximately 205 calories per serving, making them a satisfying but relatively light dessert option.
Sugars
With 10 grams of sugar, these Apple Pie Bars strike a balance between sweetness and natural flavors from the apples, allowing you to indulge without overdoing it.
Fiber Content
Thanks to the apples, each bar provides about 1.5 grams of fiber, contributing to daily dietary needs and helping keep you feeling full longer.
For more insights on making smart dessert choices, check out resources like the American Heart Association for tips on reading nutrition labels and understanding ingredients. Enjoy your baking adventure!
FAQs about Apple Pie Bars
How can I store apple pie bars properly?
To keep your apple pie bars fresh, make sure to store them in an airtight container. They can be kept in the refrigerator for up to four days. If you're looking to extend their shelf life, consider freezing them! Simply wrap each bar tightly in plastic wrap and place them in a freezer-safe container. They can last for up to three months in the freezer.
Can I make apple pie bars ahead of time?
Absolutely! One of the best things about this delicious Apple Pie Bars Recipe is that it’s perfect for prepping in advance. You can prepare the bars and assemble them, then either refrigerate or freeze them before baking. Just adjust the baking time if going straight from frozen!
What are the best apple varieties to use?
For the ideal flavor balance, use a mix of sweet and tart apples. Varieties like Granny Smith, Honeycrisp, and Fuji work beautifully. You can find more recommendations on selecting apples here. Mixing different types can elevate your apple pie bars to another level!
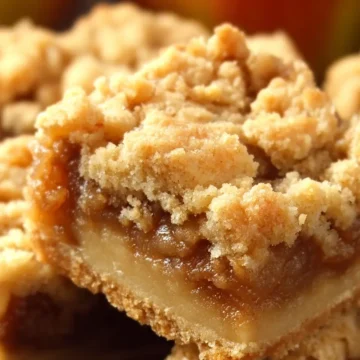
Conclusion on Apple Pie Bars Recipe
In conclusion, this Apple Pie Bars Recipe is not just a delightful treat; it's a heartwarming way to celebrate any occasion. The combination of crunchy crumb topping and tender apple filling creates a blissful harmony of textures and flavors. Don't hesitate to experiment with spices or toppings—share your favorite variations with us!
Apple Pie Bars Recipe
Equipment
- oven-proof dish
- Mixing Bowls
- spoon
- Pastry Blender
- knife
Ingredients
Apple Filling
- 550 g chopped cubed apples (4 and ½ cups-4 medium apples)
- 30 g granulated sugar (2 tablespoons)
- 25 g all-purpose flour (2 tablespoons and 1 teaspoon)
- 2 teaspoons lemon juice
- 1 teaspoon ground cinnamon
- 0.25 teaspoon ground nutmeg
Crust & Crumbles
- 280 g all-purpose flour (2 cups dip and sweep)
- 185 g unsalted butter (¾ cup and 1 tablespoon, cut into small cubes, cold)
- 105 g granulated sugar (½ cup)
- 1 teaspoon ground cinnamon
Instructions
Preparation
- Preheat the oven to 350°F(177C°). Grease 8 inch (20cm) square oven-proof dish and line the bottom and sides with parchment paper, about 2 inches(5 cm) of overhang on each side.
- Peel, core and slice the apples into small pieces. Place the chopped apples into a medium bowl. Toss the apples with lemon juice, sugar, flour/cornstarch, cinnamon and nutmeg. Set aside the bowl.
- Combine flour, cinnamon, and sugar in a large bowl.
- Add the cold cubed butter and cover with flour mixture so you can cut the butter into the flour mixture easily. You can use 2 forks or a pastry blender. Alternatively, you can rub with your fingertips.
- Spread ⅔ of the mixture into the oven-proof dish with a spoon. Lightly flour the spoon to avoid it sticking to the flour-butter mixture. You can spread with your hand too. Add the apple mixture over the dough and cover the apples with the remaining ⅓ dough. You can make some big crumbles by squeezing the dough with your hand.
- Bake for 55 minutes until the top becomes golden brown and the crumbles are crunchy. Let it cool completely before slicing. You can let it cool at room temperature for 1-1.5 hours and then you can keep in the freezer so it can cool faster. Once completely cool, lift the paper from the sides, remove the bars from the dish, cut into 16 pieces. You can keep in the fridge in an airtight container up to 4 days or freeze up to 3 months.


Leave a Reply