
Introduction to Chocolate Thumbprint Cookies
The charm of homemade chocolate thumbprint cookies
There's something undeniably charming about homemade chocolate thumbprint cookies. Perhaps it's the delightful way they blend rich chocolate flavor with a smooth, gooey center, or maybe it’s the joy of carving out those little indents with your thumb—it's pure fun! These cookies are not only easy to make but are also a visual treat, beckoning your friends and family to gather around.
Baking should be a social activity; studies show that sharing food builds connections. So, why not make a batch of these cookies during the festive season? They’re perfect for cookie exchanges, holiday parties, or simply indulging on a cozy night in. The delicious aroma that fills your kitchen as they bake is sure to create a warm atmosphere, inviting everyone to grab a cookie fresh from the oven.
In the realm of baking, the beauty of thumbprint cookies lies in their adaptability. From classic chocolate to fruit jams and even nut butters, the filling possibilities are endless. If you're new to baking or an experienced dessert maker, these chocolate thumbprint cookies are a delightful project that brings joy to both the baker and the lucky eaters! Want more ideas for your baking adventures? Check out FDA Baking Tips for great advice!
Ingredients for Chocolate Thumbprint Cookies
Key Ingredients for Deliciousness
To whip up a batch of these indulgent chocolate thumbprint cookies, you'll need some essential ingredients that create the perfect flavor and texture:
- 250 g unsalted butter – This will provide the rich, creamy base.
- 200 g granulated sugar – For that sweet touch that balances the cocoa.
- 1 large egg – Binding everything together.
- 1 tablespoon vanilla extract – Adds a delightful aroma and depth.
- 280 g plain flour – The backbone of your cookie structure.
- 70 g cocoa powder – The star ingredient for that intense chocolate flavor.
- ½ teaspoon salt – Enhances all the sweet and chocolatey notes in the cookies.
Optional Ingredients to Enhance Flavor
Want to take your cookies to the next level? Consider these optional ingredients:
- 1 teaspoon coffee extract – A hint of espresso can amplify the chocolate flavor.
- 200 g milk or dark chocolate (for ganache) – Choose your favorite for that luscious filling.
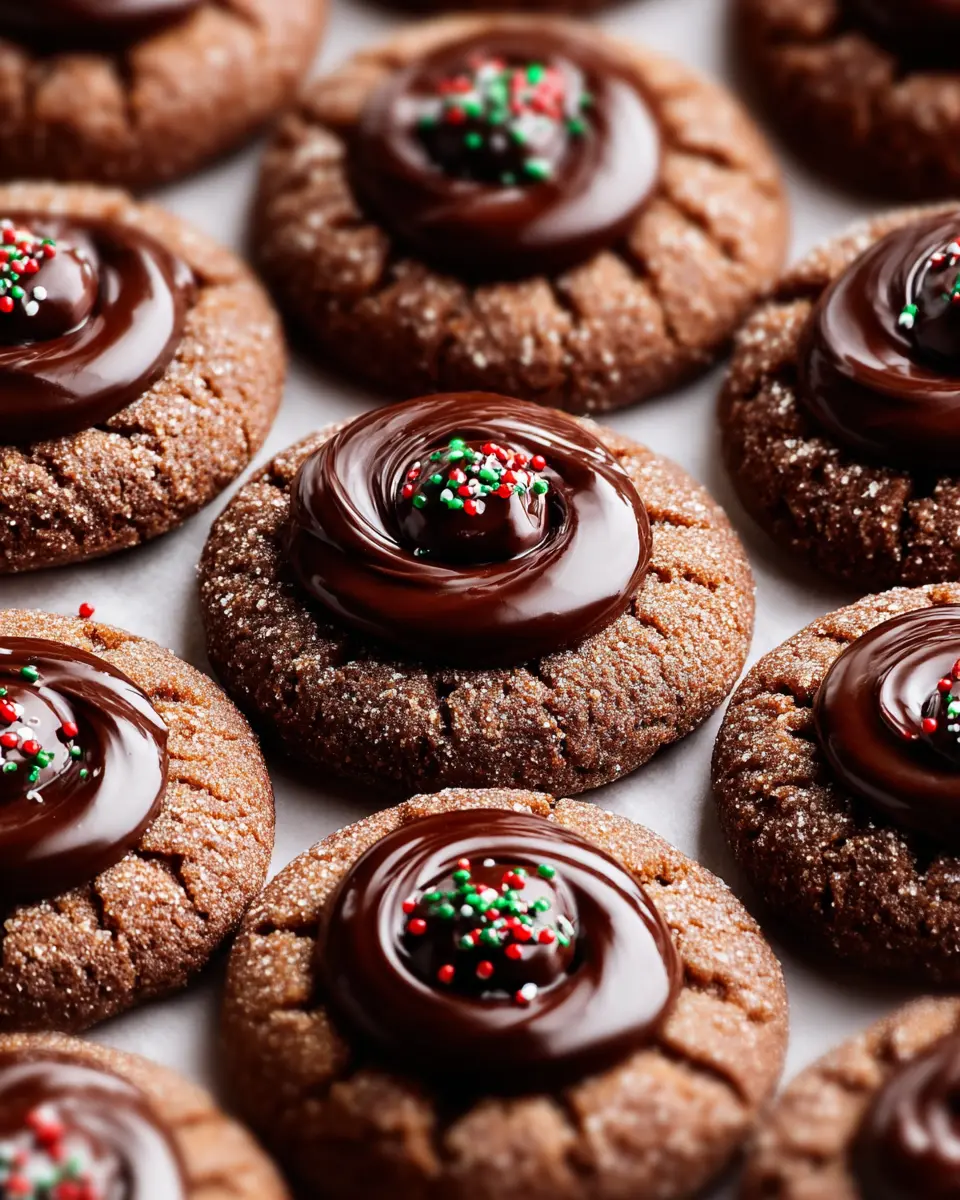
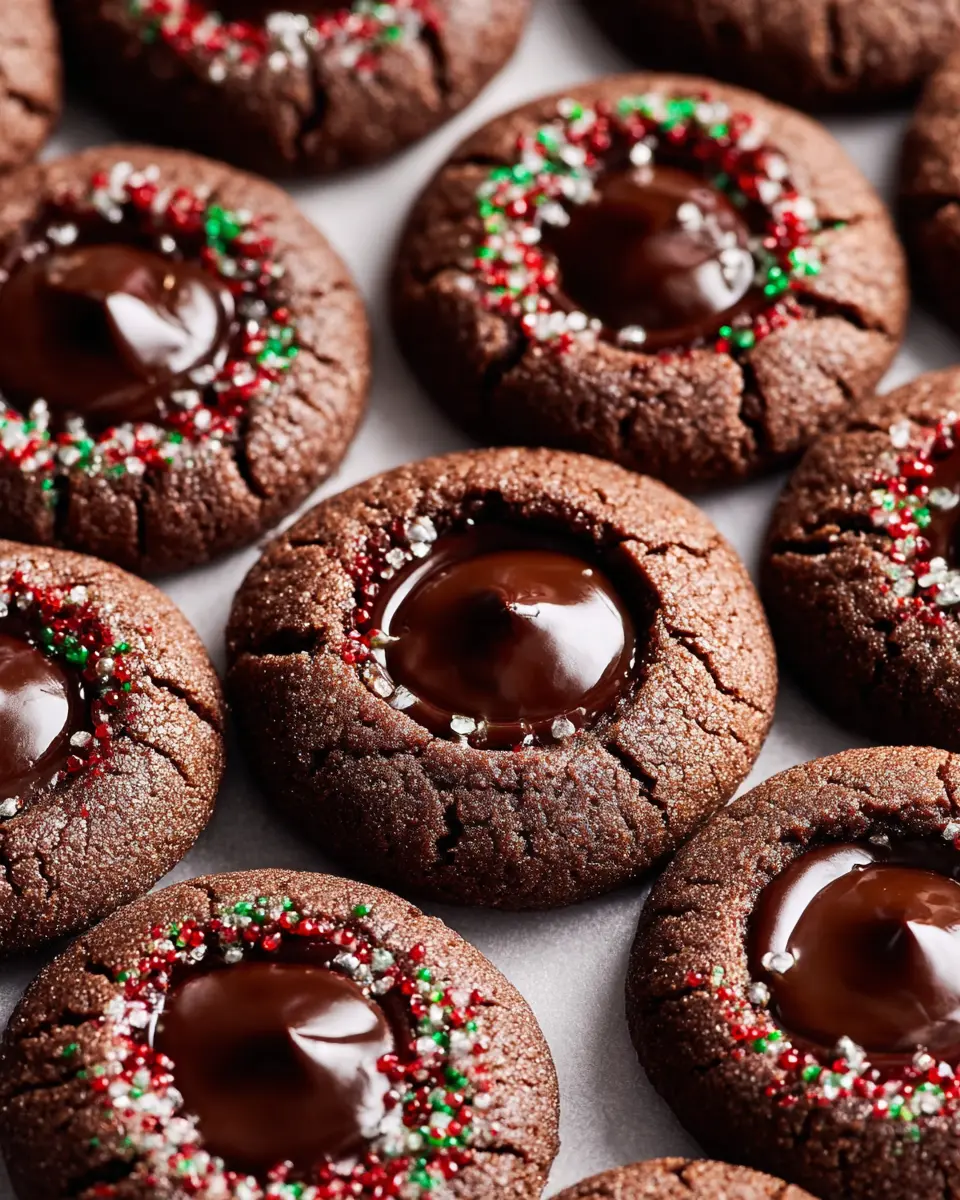
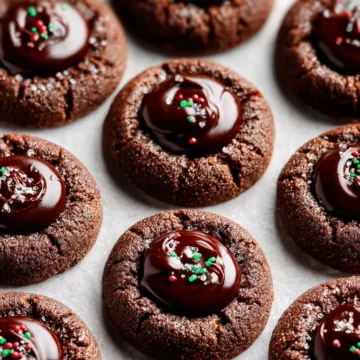
- Festive sprinkles – Perfect for adding a fun, celebratory touch.
By incorporating these simple yet effective adjustments, you'll create a batch of chocolate thumbprint cookies that everyone will adore! For more baking inspirations, check out BBC Good Food or Food Network. Happy baking!
Preparing Chocolate Thumbprint Cookies
Making chocolate thumbprint cookies is not only a delightful kitchen project but also a wonderful way to impress your friends and family during gatherings or special occasions. The process is straightforward and absolutely rewarding, so let's dive into the steps!
Creaming butter and sugar
The first step is to cream together the unsalted butter and granulated sugar. Using an electric mixer, beat the softened butter until it's light and fluffy—this usually takes about 2-3 minutes. The creaming process is essential because it incorporates air into the butter, making your cookies tender and chewy. Once you achieve that creamy texture, add in the large egg, vanilla extract, and—if you're feeling adventurous—a touch of coffee extract for depth. Mix until everything is well combined.
Combining wet and dry ingredients
In a separate bowl, sift together the plain flour, cocoa powder, and salt. Sifting not only helps to aerate the flour but also ensures there are no lumps in your dry ingredients. Gradually fold the dry mixture into your creamed butter and sugar, using a spatula. Be gentle here—overmixing can lead to tough cookies! Once they are just combined, it's time for the next step.
Shaping the cookies for thumbprints
Line your baking sheets with baking paper to prevent sticking. Using a small cookie scoop or a tablespoon, portion out the dough into uniform balls, roughly the size of a tablespoon. Make sure to leave 3-4 cm between each ball to allow for spreading. This is the fun part—use your thumb (or the back of a measuring teaspoon) to press into each cookie, creating an indentation for the filling later. Once shaped, refrigerate the cookies for 30-40 minutes. This chilling time helps prevent them from spreading too much while baking.
Baking to perfection
Preheat your oven to 180°C (165°C fan) while your cookies chill. When ready, place them on the middle shelf and bake for about 10 minutes. Halfway through, rotate your baking tray for even cooking. If you find that the indents have lost their shape during baking, don’t fret! Take them out as soon as they’re done and gently reshape the indentations with a spoon while they are still warm. Let them cool on the baking sheet for about 10 minutes before transferring to a wire rack.
Making the chocolate ganache
Now, let's get to the creamy, dreamy part! For the chocolate ganache, place the chopped milk or dark chocolate into a medium bowl. In a small saucepan over medium heat, bring the double cream to a gentle boil. As soon as bubbles start to form on the surface, remove it from the heat and pour it over the chocolate. Stir vigorously until the ganache is smooth and shiny.
Filling the thumbprints with ganache
It’s almost time to devour your chocolate thumbprint cookies! Using a spoon or a piping bag fitted with a plain nozzle, carefully fill each thumbprint with the luscious ganache. Don't forget to sprinkle some festive sprinkles on top for that extra flair!
And there you have it—your delicious chocolate thumbprint cookies are ready to share and enjoy. Whether at holiday gatherings or as a sweet treat at home, these cookies will surely be a hit.
Variations on Chocolate Thumbprint Cookies
Nutty Chocolate Thumbprint Cookies
For an exciting twist on chocolate thumbprint cookies, consider adding your favorite nuts! Substitute half the flour with finely chopped nuts like hazelnuts, walnuts, or almonds for a delightful crunch. You can even sprinkle some chopped nuts on top of the ganache before it sets, giving your cookies an extra touch of flavor and texture.
Seasonal Variations for Every Holiday
Embrace different flavors throughout the year! For a festive touch, try filling your cookies with peppermint-flavored ganache around Christmas or pumpkin spice ganache during fall. For Valentine's Day, a raspberry ganache paired with heart-shaped sprinkles can make your chocolate thumbprint cookies truly special. Get creative, and let each holiday inspire you to whip up delicious variations!
Cooking notes for Chocolate Thumbprint Cookies
Tips for perfect texture
To achieve the ultimate texture for your chocolate thumbprint cookies, remember to cream the butter and sugar until light and fluffy. This aeration creates a tender cookie. Chilling the dough before baking is essential—avoid skipping this step! It helps the cookies maintain their shape. If your indents lose their form during baking, gently reshape them with a spoon right after they come out.
How to store and freeze cookies
Store your chocolate thumbprint cookies in an airtight container at room temperature for up to a week. Want to enjoy them later? These cookies freeze well! Place them in a freezer-safe container and they’ll last up to three months. Just thaw them in the fridge overnight before enjoying! Did you know you can also freeze the unbaked dough? Wrap it tightly and store it for baking enthusiasm whenever the mood strikes! For more storage tips, read on this article.

Serving suggestions for Chocolate Thumbprint Cookies
Pairing Cookies with Drinks
When it comes to enjoying your chocolate thumbprint cookies, consider pairing them with delightful drinks. For a cozy experience, a cup of hot cocoa or rich coffee elevates the chocolate flavor beautifully. If you're feeling adventurous, try them with a glass of chilled oat milk or a sweet almond milk latte. These options not only complement the cookies but also enhance their indulgence. Looking for something more refreshing? A fruity herbal tea can balance the richness of the cookies perfectly.
Creative Serving Ideas for Gatherings
Make your chocolate thumbprint cookies the star of your next gathering! Display them on a decorative platter and add a few colorful fruits or festive sprinkles nearby for a pop of color. For a unique twist, consider placing each cookie in a small cupcake liner, creating an adorable tiered display. If you’re celebrating a special occasion, why not turn these cookies into a decadent dessert bar? Provide a variety of toppings like crushed nuts, mini marshmallows, or flavored ganaches. A DIY cookie decoration station can engage your guests and make for a fun, interactive experience!
Time details for Chocolate Thumbprint Cookies
Preparation time
Getting ready to whip up these delectable chocolate thumbprint cookies takes about 15 minutes. You’ll need just enough time to gather your ingredients and mix everything together. Don't forget to chill the cookie dough for the perfect texture!
Baking time
Bake your cookies for 10 minutes at 180°C (165°C fan). Keep an eye on them to ensure they form perfect little indentations for that luscious ganache.
Total time
From start to finish, you’ll be enjoying these delightful cookies in just 25 minutes. It’s a quick and satisfying way to indulge your sweet tooth or impress your friends at your next gathering!
For more tips on timings or variations, check out this article on cookie baking techniques.
Nutritional Information for Chocolate Thumbprint Cookies
Calories per cookie
Each delectable chocolate thumbprint cookie contains approximately 191 calories. This makes them a delightful treat that can satisfy your sweet tooth without derailing your diet, especially during the festive season when indulgence is common.
Dietary considerations
These cookies are great for sharing, but if you have specific dietary preferences, here are some helpful points:
- Gluten sensitivity: The recipe contains plain flour, so consider using a gluten-free substitute.
- Dairy-free option: For a dairy-free treat, swap out the butter with a plant-based alternative and use coconut cream for the ganache.
- Nut-free: The recipe is nut-free, making it suitable for parties and gatherings where allergies may be a concern.
Feel free to get creative! Personalize your chocolate thumbprint cookies to suit your dietary needs while still enjoying their amazing flavor. For more insights into nutrition, consider visiting the USDA FoodData Central for detailed breakdowns of ingredients.
FAQs about Chocolate Thumbprint Cookies
Can I substitute ingredients?
Absolutely! You can experiment with your chocolate thumbprint cookies by substituting ingredients. For a dairy-free option, try using coconut oil instead of butter. Substitute the granulated sugar with coconut sugar for a more natural sweetness. If you're looking for a gluten-free option, you can use gluten-free all-purpose flour or almond flour. Just keep in mind that these substitutions might slightly alter the texture or flavor, so feel free to adjust to your taste.
How long do they last?
When stored properly, your delicious chocolate thumbprint cookies will last about 5-7 days at room temperature. They make for a perfect treat throughout the week!
What's the best way to store them?
To keep your cookies fresh, store them in an airtight container at room temperature. For longer storage, you can freeze them for up to three months. Just place them in a freezer-friendly container, and when you're ready to indulge, thaw them in the fridge overnight. Enjoy your baking!
Conclusion on Chocolate Thumbprint Cookies
Making chocolate thumbprint cookies at home is a delightful experience worth trying. With their rich, chocolatey flavor and the added joy of personalizing with ganache and sprinkles, these cookies are perfect for sharing. Plus, the simple recipe makes them accessible to bakers of all levels—an ideal festive treat!
Chocolate Thumbprint Cookies
Equipment
- hand-held electric mixer or freestanding mixer with the paddle attachment
- one large or two small baking sheets
- baking paper
- small cookie scoop or 1 tablespoon measuring spoon (optional)
- piping bag with plain nozzle (optional)
Ingredients
- 250 g unsalted butter softened
- 200 g granulated sugar
- 1 large egg
- 1 tablespoon vanilla extract
- 1 teaspoon coffee extract optional
- 280 g plain flour
- 70 g cocoa powder
- 0.5 teaspoon salt
Chocolate Ganache
- 200 g milk or dark chocolate chopped
- 200 ml double cream
- 4 tablespoon festive sprinkles
Instructions
- Using an electric mixer, cream together butter and sugar until light and fluffy. Add an egg, vanilla extract and coffee extract, combine together. In a separate bowl sift together the flour, cocoa powder and salt, and mix to combine. Add dry ingredients into the butter mix and fold until the ingredients are combined.
- Line the baking tray with baking paper. Roll balls of dough, about 1 tablespoon each, and place on a baking tray leaving 3-4 cm space between each cookie. Using your thumb (or a back of measuring teaspoon), make an indent into each cookie. Once you have used up all of the dough, place cookies in the fridge for 30-40 minutes.
- Heat the oven to 180°C (165°C fan). Remove cookies from the fridge and place in the middle shelf in the oven. Bake for 10 minutes, rotating the baking tray half way through. If the indents lost their shape, use the back of the spoon to gently press in the middle of each cookie and make the indents again. Allow the cookies to cool for about 10 minutes and transfer to a wire rack.
- Place the chopped chocolate into a medium bowl. Pour the cream into a small saucepan over medium heat and bring it to the gentle boil. Once the bubbles start to appear on the surface, remove the cream from the heat and pour over the chopped chocolate. Stir them both together vigorously, until you have smooth, shiny ganache and all the chocolate has melted.
- Spoon the ganache into each cookie, or transfer it into a piping bag with a nozzle and pipe small amounts of ganache into each cookie. Add some festive sprinkles on top.


Leave a Reply