
Introduction to No-Bake Peanut Butter Oat Cups
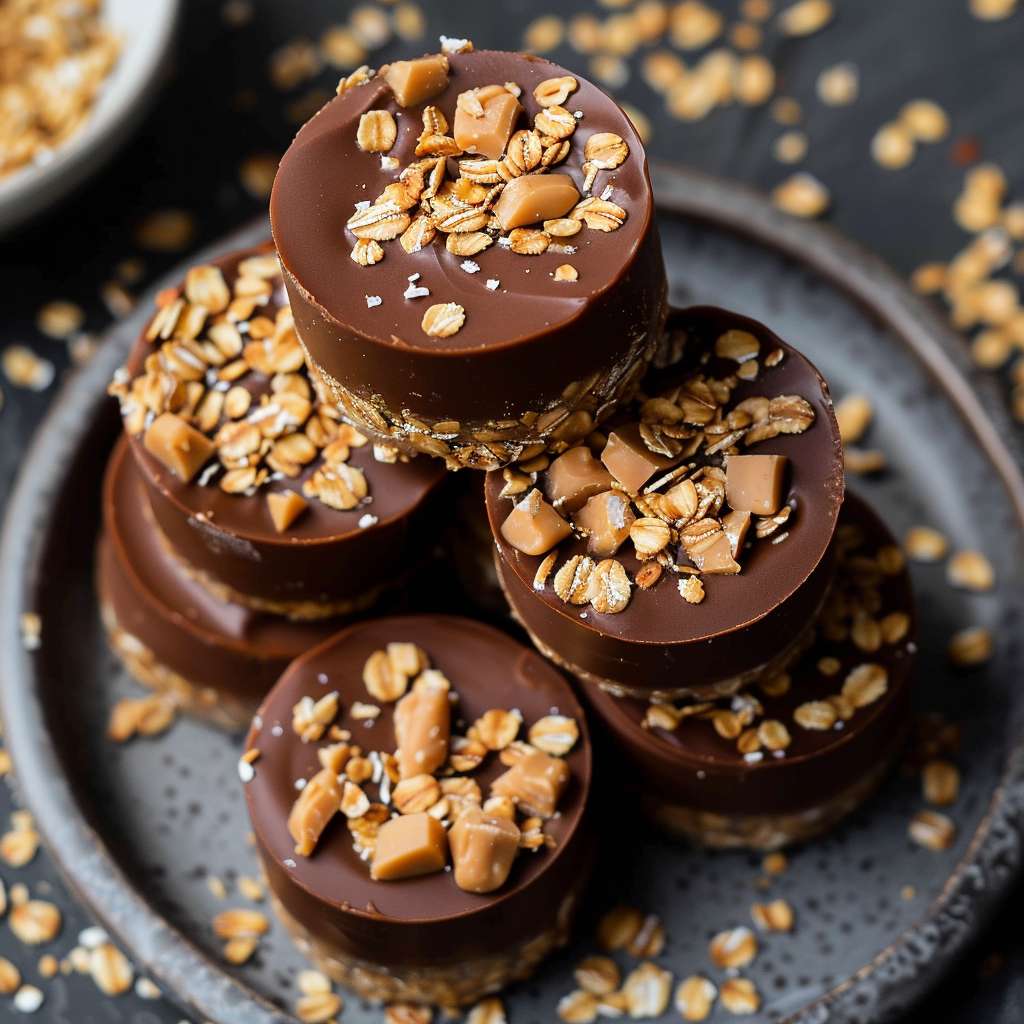
No-bake peanut butter oat cups are a delightful and healthy treat that combines the rich, creamy taste of peanut butter with the wholesome goodness of oats. These easy-to-make snacks are perfect for satisfying your sweet tooth without the need for an oven. Simply mix the ingredients, press them into a mold, and let them set in the refrigerator. In no time, you have a delicious snack that’s both nutritious and delicious.
The popularity of no-bake recipes has surged in recent years, and for good reason. These recipes are incredibly convenient, requiring minimal equipment and time. They are perfect for those who want to enjoy homemade treats without the hassle of baking. Moreover, no-bake desserts often retain more nutrients since they are not exposed to high baking temperatures, making them a healthier choice. For example, oats are packed with fiber and essential vitamins, while peanut butter offers protein and healthy fats.
The purpose of this article is to guide you through the process of making your own no-bake peanut butter oat cups at home. We will cover everything from the necessary ingredients and preparation steps to serving suggestions and nutritional information. You’ll also find tips for customizing the recipe to suit various dietary needs and preferences. For those looking to make healthier food choices, check out these Healthy Eating Tips to complement your snacking habits.
By the end of this article, you’ll be equipped with all the knowledge needed to create these tasty treats. Whether you’re preparing snacks for a party, a quick breakfast, or a post-workout treat, no-bake peanut butter oat cups are a versatile and wholesome option. Dive in and discover how easy and enjoyable making these snacks can be.
Cooking Methods
No-Bake Method
Step-by-step instructions for making no-bake oat cups:
- Prepare the muffin pan: Line a muffin pan with paper liners or lightly grease each cup with coconut oil to prevent sticking.
- Mix dry ingredients: In a large bowl, combine 2 cups of quick-cooking oats, 1/2 cup of chopped peanuts, and a pinch of salt. Stir well.
- Combine wet ingredients: In a separate microwave-safe bowl, add 1 cup of natural peanut butter, 1/2 cup of honey or maple syrup, 1/4 cup of melted coconut oil, and 1 teaspoon of vanilla extract. Microwave in 20-second intervals until warm and smooth. Stir to combine.
- Mix dry and wet ingredients: Pour the wet mixture over the dry ingredients and mix thoroughly until all oats are coated.
- Form the cups: Scoop about 2 tablespoons of the mixture into each muffin cup, pressing down firmly to compact.
- Add chocolate topping (optional): Melt 1 cup of dark chocolate chips in the microwave in 20-second intervals, stirring until smooth. Drizzle or spread over each oat cup.
- Chill: Refrigerate the muffin pan for at least 1 hour, until the oat cups are firm and set.
- Serve: Once set, remove the oat cups from the muffin pan and enjoy. Store leftovers in an airtight container in the refrigerator.
Benefits of no-bake desserts:
- Convenience: No need for an oven, making it perfect for hot days or quick preparation.
- Nutrient retention: Ingredients maintain more of their natural nutrients since they aren’t exposed to high heat.
- Safety: Ideal for cooking with kids, as there’s no risk of burns from an oven.
Tips for achieving the best texture:
- Compact the mixture: Pressing firmly into the muffin cups ensures the oat cups hold their shape.
- Chill adequately: Allowing enough time in the refrigerator helps the cups set properly and maintain their structure.
- Use room temperature ingredients: Easier mixing and better texture in the final product.
For more tips on creating delicious no-bake desserts, explore these No-Bake Dessert Recipes.
Serving Suggestions

How to Serve
Presentation ideas:
- Platter style: Arrange the no-bake peanut butter oat cups on a decorative platter with a sprinkle of chopped peanuts or drizzled chocolate for a polished look.
- Individual servings: Place each oat cup in a colorful cupcake liner and serve on small plates for a more formal presentation.
- Dessert board: Include the oat cups as part of a dessert board with fruits, nuts, and other treats.
Serving sizes and tips:
- Portion control: One to two oat cups per person is typically sufficient as a snack or dessert.
- Garnishing: Add a light dusting of powdered sugar, a drizzle of extra melted chocolate, or a few fresh berries on top for added flair.
- Storing: Keep leftovers in an airtight container in the refrigerator for up to one week for best freshness.
Pairing Suggestions
Recommended beverages and sides
- Beverages:
- Milk: A classic pairing that complements the creamy peanut butter.
- Coffee or tea: Provides a nice contrast to the sweetness of the oat cups.
- Smoothies: A fruit smoothie, especially with bananas or berries, pairs well with the nutty flavor.
- Sides:
- Fresh fruit: Berries, apple slices, or banana slices enhance the sweetness and add freshness.
- Yogurt: A side of Greek yogurt can add protein and create a more filling snack.
- Nut mix: A small bowl of mixed nuts can add a crunchy contrast.
Complementary flavors
- Chocolate: Whether dark or milk chocolate, it pairs perfectly with the peanut butter and oat flavors.
- Berries: Strawberries, raspberries, and blueberries offer a tartness that balances the sweetness.
- Cinnamon: A sprinkle of cinnamon can add a warm, aromatic touch.
For more ideas on creating balanced and healthy snacks, check out these Healthy Eating Tips.
Nutritional Information
Nutritional Breakdown
Each serving of no-bake peanut butter oat cups (one cup) contains:
- Calories: 220
- Protein: 5 grams
- Fat: 15 grams (saturated fat: 6 grams)
- Carbohydrates: 20 grams
- Fiber: 3 grams
- Sugars: 10 grams
- Sodium: 100 milligrams
Health benefits of the ingredients used
- Oats: Rich in dietary fiber, which aids digestion and helps maintain a healthy weight. Oats also provide essential vitamins and minerals like manganese, phosphorus, and magnesium.
- Peanut butter: A great source of protein and healthy fats, which are important for muscle repair and overall energy. Peanut butter also contains vitamins E and B6.
- Honey: A natural sweetener with antioxidants and antibacterial properties. It also provides quick energy from natural sugars.
- Coconut oil: Contains medium-chain triglycerides (MCTs), which can boost metabolism and support brain health.
- Dark chocolate: Rich in antioxidants, it can improve heart health and provide a satisfying, sweet flavor.
Recipe Variations and Customizations
Different variations of no-bake peanut butter oat cups:
- Chocolate Peanut Butter Oat Cups:
- Add 2 tablespoons of cocoa powder to the oat mixture for a rich, chocolatey flavor.
- Drizzle with melted dark chocolate or add a layer of chocolate ganache on top.
- Coconut Almond Oat Cups:
- Substitute peanut butter with almond butter.
- Add 1/4 cup of shredded coconut to the oat mixture for extra texture and flavor.
- Fruit and Nut Oat Cups:
- Mix in 1/4 cup of dried fruit like raisins, cranberries, or chopped dates.
- Add a handful of chopped nuts such as almonds, walnuts, or pecans for added crunch.
- Protein-Packed Oat Cups:
- Stir in 2 scoops of your favorite protein powder to the oat mixture.
- Use almond or cashew butter for a different nutty flavor.
- Spiced Oat Cups:
- Add 1 teaspoon of cinnamon and a pinch of nutmeg to the mixture.
- Drizzle with a mixture of melted coconut oil and a touch of maple syrup for a spiced glaze.
Ideas for vegetarian, vegan, and gluten-free versions:
- Vegetarian:
- The original recipe is already vegetarian as it contains no meat or animal by-products.
- Vegan:
- Replace honey with maple syrup or agave nectar.
- Use vegan dark chocolate chips for the topping.
- Gluten-Free:
- Ensure that the oats used are certified gluten-free.
- Substitute any wheat-based ingredients with gluten-free alternatives.
For more creative ideas, check out these No-Bake Dessert Recipes.
Customization Tips
How to customize based on preferences and dietary needs:
- Sweetness Level:
- Adjust the amount of honey or maple syrup to make the oat cups more or less sweet.
- Texture:
- For a crunchier texture, add more chopped nuts or granola.
- For a smoother texture, use creamy peanut butter and finely ground oats.
- Flavor Profile:
- Add extracts such as almond, coconut, or mint for different flavor twists.
- Incorporate spices like cinnamon, cardamom, or pumpkin spice to complement the peanut butter.
- Dietary Adjustments:
- For low-sugar versions, use a natural sweetener like stevia or monk fruit.
- For higher protein content, mix in protein powder or add seeds like chia or flaxseeds.
By following these customization tips, you can create no-bake peanut butter oat cups that cater to your specific tastes and dietary requirements. This flexibility ensures that everyone can enjoy these delicious treats.
Storage and Reheating
Storing Leftovers
Best practices for storing no-bake peanut butter oat cups:
- Airtight container: Store the oat cups in an airtight container to maintain freshness and prevent them from absorbing odors from the fridge.
- Layering: Place a piece of parchment paper between layers to prevent sticking.
- Refrigeration: Keep the container in the refrigerator to ensure the oat cups remain firm and retain their shape.
How long they can be stored:
- Refrigerator: No-bake peanut butter oat cups can be stored in the refrigerator for up to one week.
- Freezer: For longer storage, place the oat cups in a freezer-safe container and store them in the freezer for up to three months. Thaw them in the refrigerator before eating.
Reheating Tips
How to enjoy them cold or reheat without melting:
- Cold enjoyment:
- These oat cups are delicious straight from the fridge. The cold temperature enhances the texture and flavor, making them a refreshing treat.
- Reheating:
- While no-bake peanut butter oat cups are typically enjoyed cold, if you prefer them slightly warmer, use the following method to avoid melting:
- Microwave: Place an oat cup on a microwave-safe plate. Microwave on low power (50%) for 10-15 seconds. Check the texture and warmth, and repeat in short intervals if necessary. Be careful not to overheat, as this can cause the chocolate to melt and the oat cup to lose its shape.
- Room temperature: Take the oat cups out of the refrigerator and let them sit at room temperature for 10-15 minutes before eating. This will soften them slightly without the risk of melting.

Easy No-Bake Peanut Butter Oat Cups: Healthy Snack Delight
- Total Time: 10 minutes
- Yield: 12 cups 1x
- Diet: Vegetarian
Description
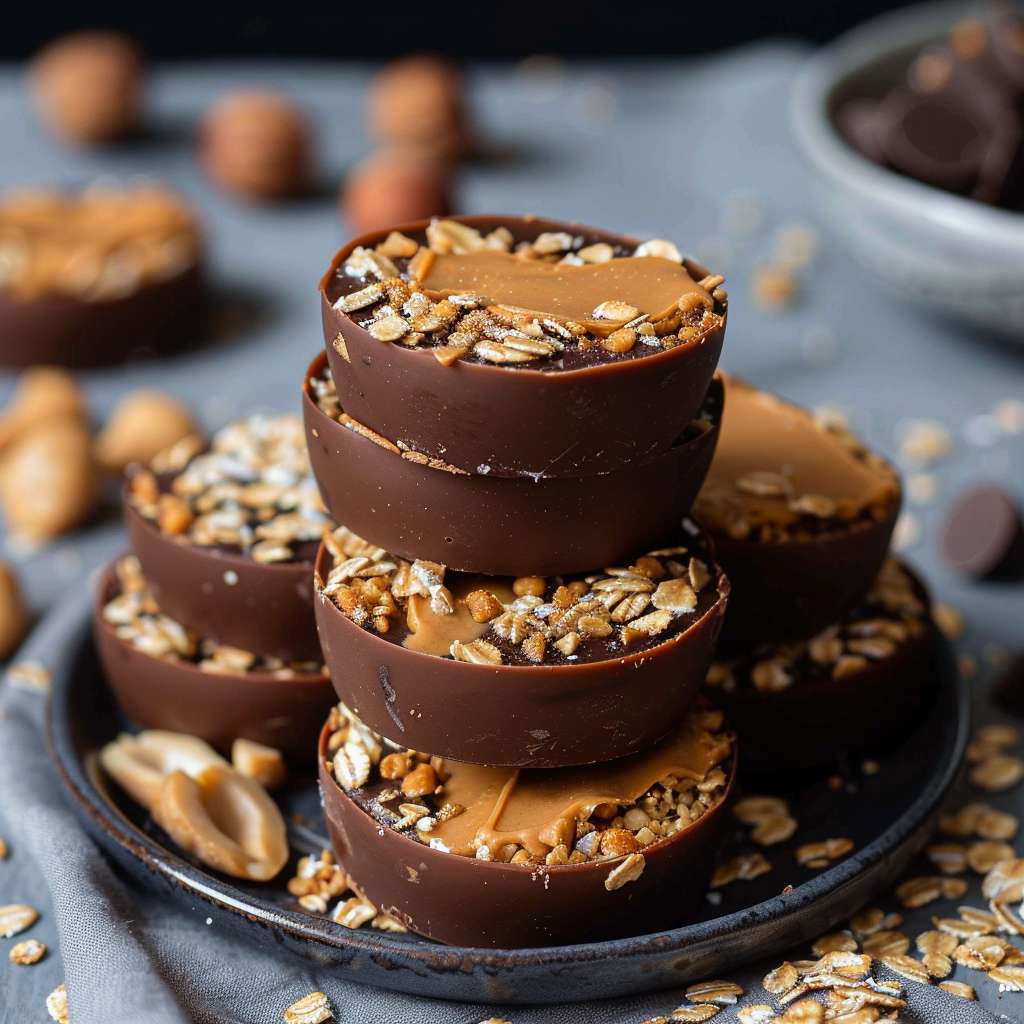
These easy no-bake peanut butter oat cups are a healthy and delicious snack option, perfect for a quick energy boost or a satisfying treat.
Ingredients
Oat Layer:
- 2 cups quick-cooking oats
- ½ cup honey
- ⅓ cup all-natural, creamy peanut butter
- ⅓ cup chopped peanuts
- Optional: 1-2 teaspoons water
Chocolate Layer:
- 6 oz. dark chocolate, chopped
- 2 teaspoons coconut oil
Peanut Butter Layer:
- ½ cup all-natural, creamy peanut butter
- 1 teaspoon coconut oil
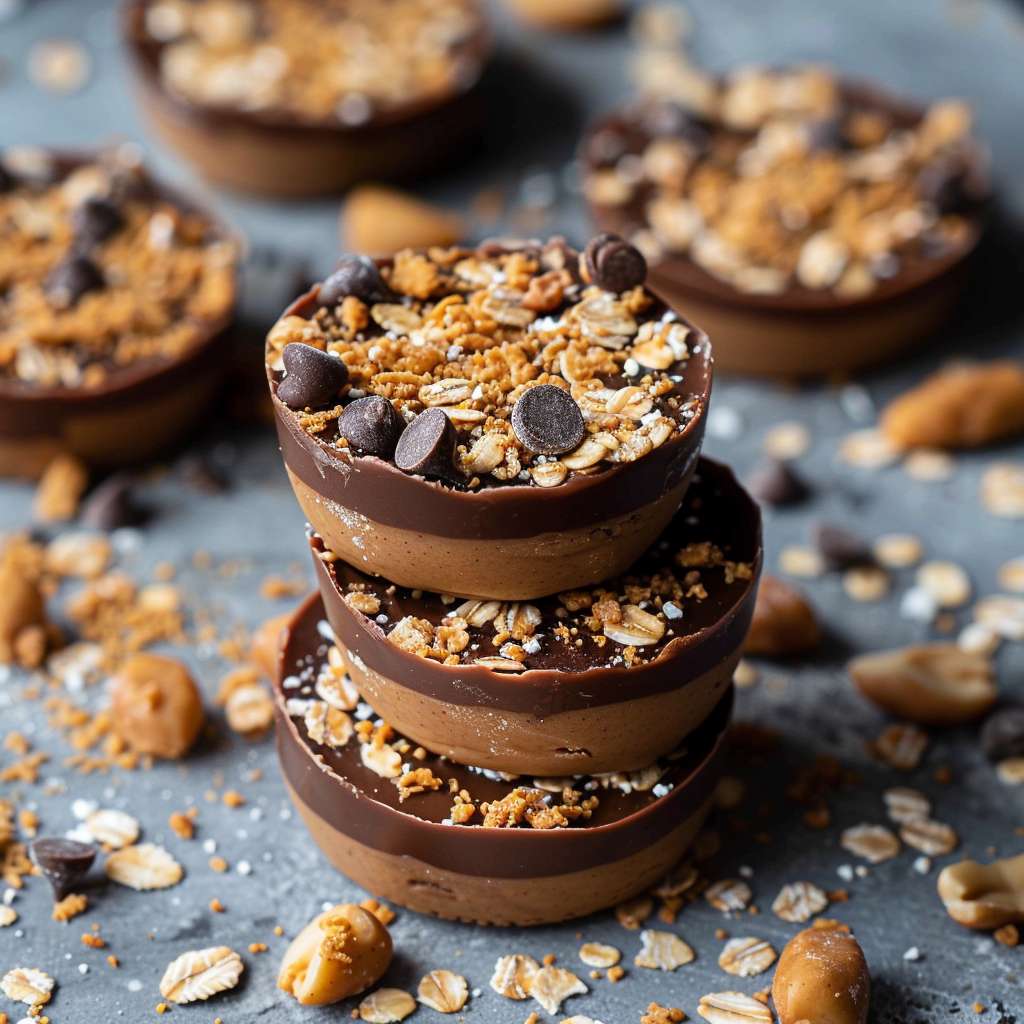
- ¼ cup mini chocolate chips
Instructions
- Line a metal muffin pan with paper liners or use a silicone muffin pan (no need to line the silicone pan).
- Make the Oat Layer:
- In a bowl, combine the quick-cooking oats, honey, peanut butter, and chopped peanuts. Mix until well combined. If the mixture is too dry, add 1-2 teaspoons of water.
- Scoop about 2 tablespoons of the oat mixture into each muffin cup and press firmly to form a base.
- Prepare the Chocolate Layer:
- Place the chopped dark chocolate and coconut oil in a microwave-safe bowl. Microwave on high in 20-second increments, stirring between each increment, until the chocolate is melted and smooth.
- Add 2 teaspoons of melted chocolate on top of the oat layer in each muffin cup. Swirl the muffin pan to spread the chocolate evenly over the oats. If there is any remaining melted chocolate, distribute it evenly among the cups.
- Freeze the muffin pan for 5 minutes to set the chocolate layer.
- Make the Peanut Butter Layer:
- In another microwave-safe bowl, combine the creamy peanut butter and coconut oil. Microwave for 15 seconds, then stir until well combined.
- Add 2 teaspoons of the peanut butter mixture on top of the chocolate layer in each muffin cup. Swirl the pan again to even out the peanut butter layer.
- Sprinkle mini chocolate chips on top of each cup.
- Freeze the muffin pan for at least 30 minutes to an hour until the layers are fully set.
- Once set, remove the oat cups from the muffin pan. Transfer them to a freezer bag and store them in the freezer.
Notes
For a nut-free version, substitute peanut butter with sunflower seed butter. You can also add dried fruits or nuts for extra flavor and texture.
- Prep Time: 10 minutes
- Cook Time: 0 minutes
- Category: Snack
- Method: No-Bake
- Cuisine: American
Nutrition
- Calories: 150
- Fat: 10g
- Carbohydrates: 15g
- Protein: 4g