
Introduction to Spicy Tuna Onigiri
Why Onigiri is the Perfect Homemade Snack for Young Professionals
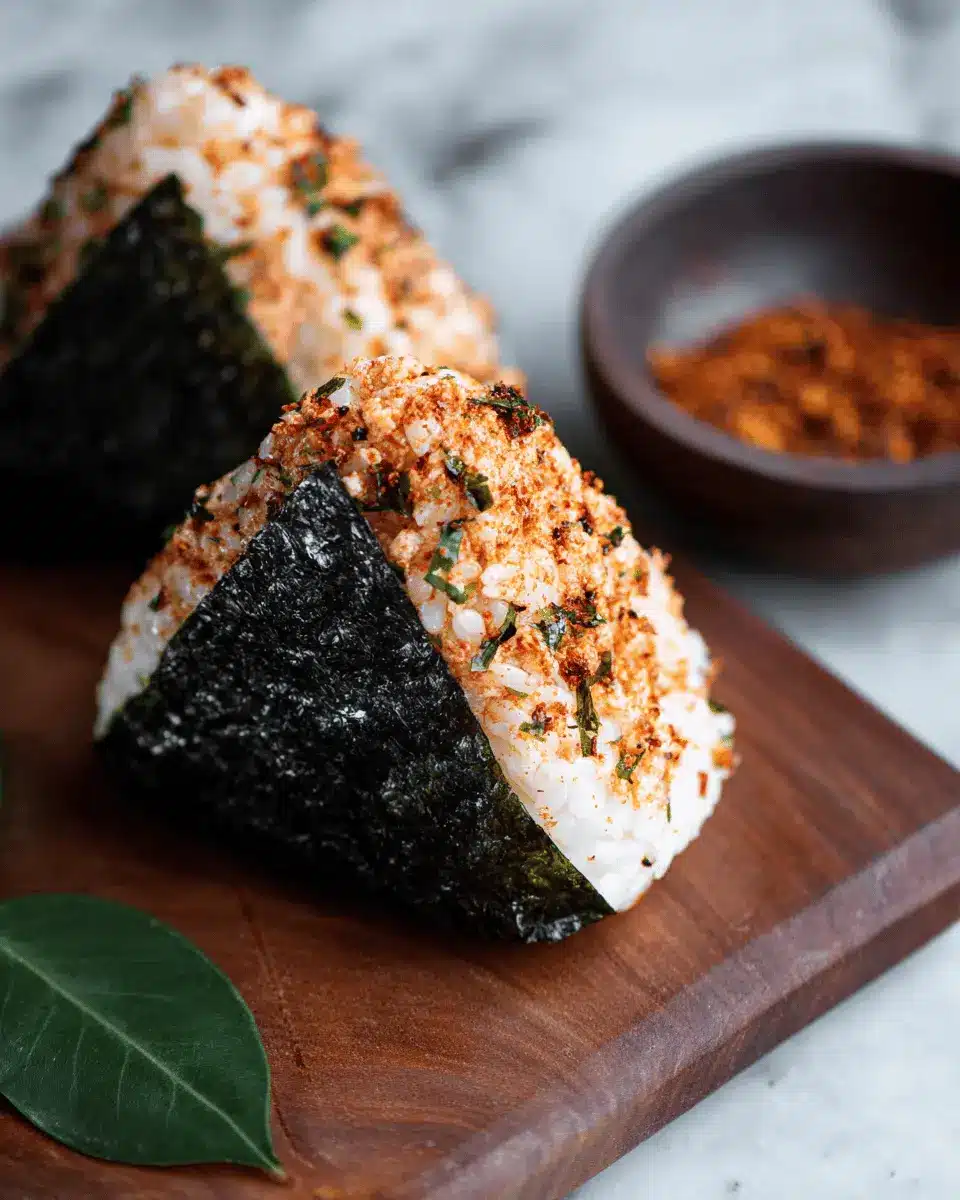
If you're a young professional juggling a busy schedule, finding a delicious yet easy-to-make snack can feel like a challenge. Enter spicy tuna onigiri—a perfect blend of convenience and flavor. These Japanese rice balls are not just a treat for your taste buds; they're also incredibly versatile and portable. Packing a punch of flavor, they can easily fit into your lunchbox, making them an ideal go-to snack for your hectic workdays.
Homemade onigiri allows you to control the ingredients, ensuring that you're eating something both wholesome and tailored to your preferences. Plus, they're simple to prepare, taking just around 50 minutes total. Each bite of spicy tuna and perfectly seasoned rice makes you feel like you've taken a short getaway to Japan, even if you’re just at your desk!
Curious about how to whip up these delightful rice balls? Let’s dive into the recipe, where you’ll discover that the combination of canned tuna, mayonnaise, and a kick of sriracha creates an unforgettable filling. For more insights on the rich tradition of onigiri, check out this article on Japanese rice culture. You’re just a few steps away from mastering this easy snack!
Ingredients for Spicy Tuna Onigiri
Key Ingredients You’ll Need
To create delicious spicy tuna onigiri, you’ll want to gather the following key ingredients:
- Japanese short-grain rice: This type of rice is essential for achieving the perfect texture. Opt for about 1½ cups.
- Canned tuna: A 4.5-ounce can of Portofino Solid Albacore Tuna in Extra Virgin Olive Oil works beautifully for a rich flavor.
- Mayonnaise and sriracha: These add creaminess and a spicy kick. Just 1½ tablespoons of mayo and 1 teaspoon of sriracha are all you need.
- Rice vinegar and scallions: A teaspoon of rice vinegar and a scallion (green parts only) provide freshness and a zingy edge.
- Toasted nori: Cut into pieces for wrapping your onigiri.
Optional Ingredients to Elevate Your Onigiri
While the essentials will create a fantastic spicy tuna onigiri, consider these optional ingredients to enhance your dish:
- Toasted black sesame seeds: Sprinkle these on top for added texture and flavor.
- Pickled vegetables: Adding some pickled veggies on the side can bring a delightful contrast to the spiciness.
- Avocado: A slice of avocado can add creaminess and richness, making your onigiri even more satisfying.
By using these ingredients, you can easily customize your spicy tuna onigiri to your taste preferences! For more inspiration, check out The Kitchn’s guide to sushi rice to understand the versatility of sushi rice in various recipes.
Preparing Spicy Tuna Onigiri
Making spicy tuna onigiri is not just about following steps but enjoying the process! From rinsing the rice to shaping each rice ball, let’s dive into the steps that will have you creating delicious onigiri in no time.
Rinse and Cook the Rice
First things first, let's prepare our sushi rice. Rinse 1½ cups of Japanese short-grain rice under cold water in a fine-meshed sieve. Don’t rush this step; thoroughly rubbing the grains until the water runs clear will help achieve that perfect texture. Once rinsed, drain the rice well and combine it with 15 fluid ounces of cold water in a rice cooker. If you don’t have one, no worries! You can use a medium saucepan. Just bring the rice and water to a boil, then reduce heat and cover, cooking for about 16 to 18 minutes until all the water is absorbed. When done, fluff the rice and cover it with a towel for 10 minutes to let it cool slightly while you prepare the filling.
Prepare the Tuna Filling
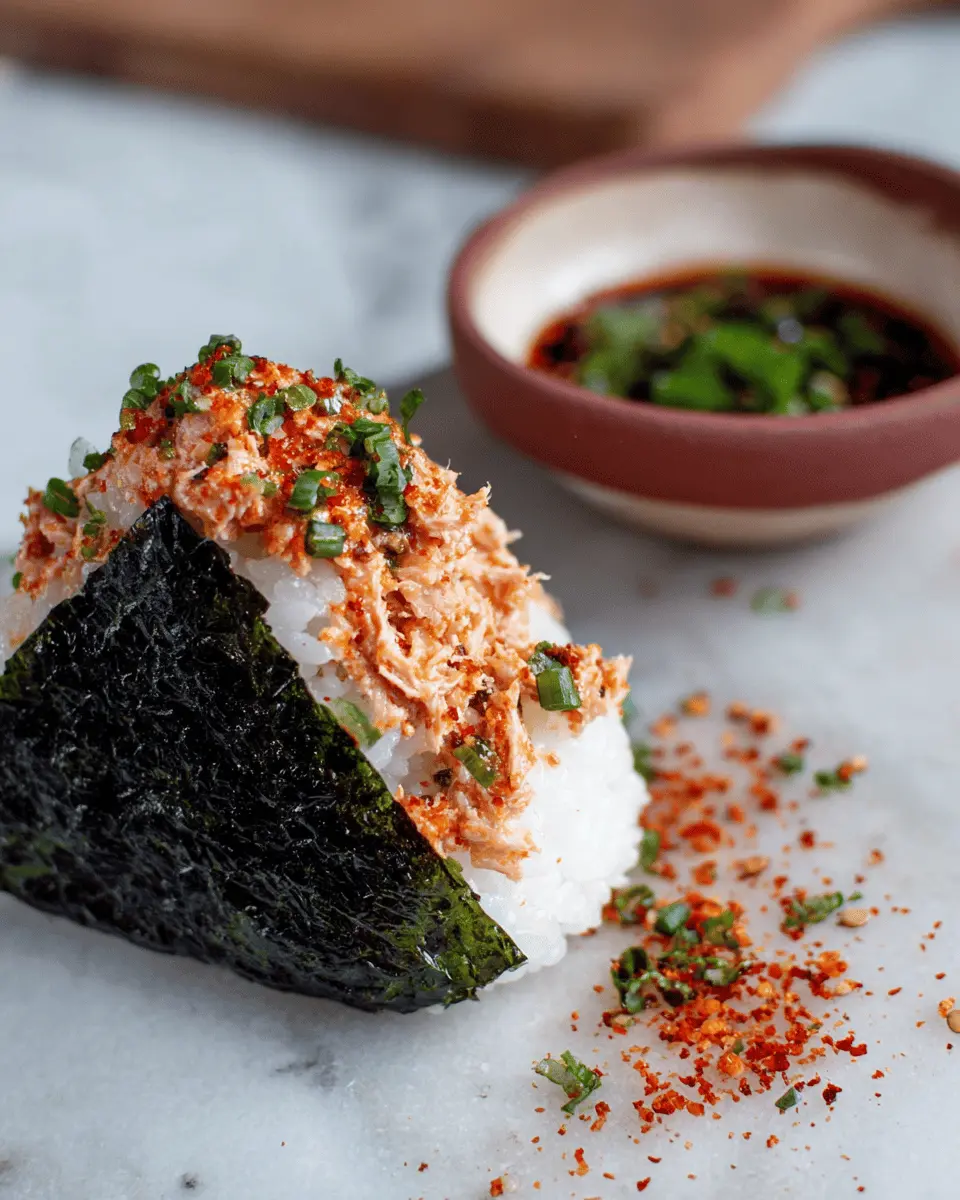
This flavorful filling is what makes the spicy tuna onigiri pop. Grab a medium bowl and combine one drained can of Portofino Solid Albacore Tuna in Extra Virgin Olive Oil with 1½ tablespoons of mayonnaise, 1 teaspoon of sriracha hot sauce, and ½ teaspoon of rice vinegar. Use a fork to mix these ingredients together until it’s evenly combined. The key here is to ensure the elements meld beautifully. Stir in finely sliced scallions, and set this zesty blend aside for your onigiri.
Assemble the Onigiri
Now comes the really fun part—assembling your spicy tuna onigiri! Before you start, set up a medium bowl of room temperature water and a small bowl of kosher salt. This will keep your hands from getting too sticky. When the sushi rice has cooled enough to handle, lightly wet your hands and sprinkle a bit of salt. Take about ½ cup of the rice and shape it into an oblong mound in one palm.
Shape the Onigiri and Add the Nori
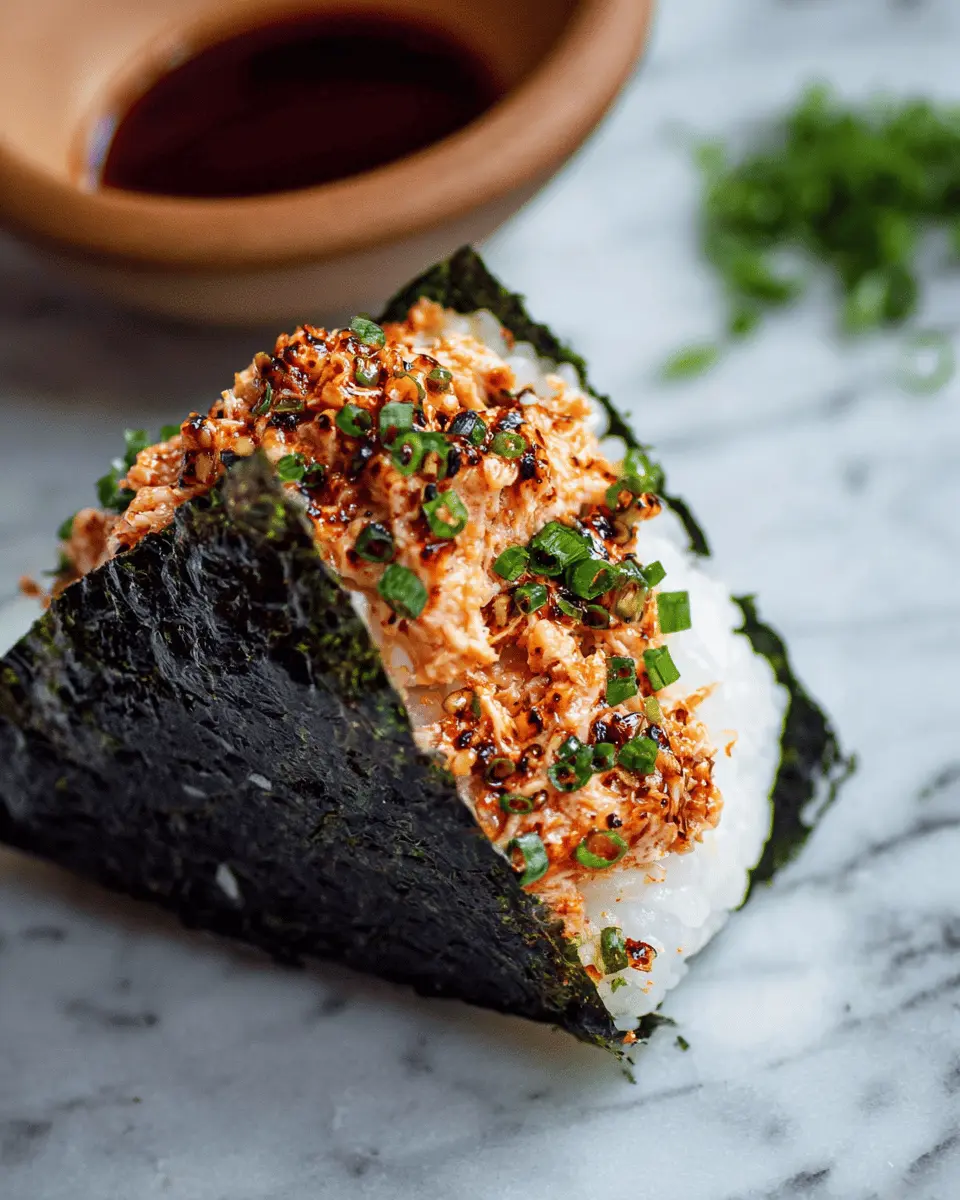
Here’s where the magic happens: create a small indention in the rice mound and spoon a tablespoon of your tuna filling right in the center. Gently seal the rice around the filling. Now, using the palms of one hand and the fingers of the other, shape the rice into a triangular form. Remember not to compress it too hard; you still want a fluffy texture! For a finishing touch, sprinkle toasted black sesame seeds over the outside and wrap each onigiri in a half sheet of nori.
Serve or Store for Later
Your spicy tuna onigiri is now ready to shine! Serve them immediately for the best flavor and texture. If you're making these ahead, feel free to store them in an airtight container. Just remember, freshly made onigiri tastes best!
Enjoy this delightful Japanese treat with friends or save some for a quick lunch during your busy week. Who can resist vibrant flavors in a convenient rice ball? For more onigiri inspirations, check out sites like Just One Cookbook or Serious Eats for ideas on variations!
Variations on Spicy Tuna Onigiri
Spicy Salmon Onigiri
If you're a fan of spicy tuna onigiri, why not switch it up with spicy salmon onigiri? Simply substitute the tuna with canned salmon, adding a bit of chopped jalapeño for an extra kick. This refreshing twist retains the same creamy texture thanks to the mayonnaise and brings a delightful richness that salmon lovers will adore.
Veggie Onigiri Filling Ideas
For a colorful, plant-based option, consider filling your onigiri with a mix of sautéed vegetables like bell peppers, carrots, and edamame, seasoned with soy sauce and sesame oil. You can also whip up a spicy avocado filling by mashing ripe avocado with sriracha and a dash of lime juice. These vegetarian versions not only offer a lighter alternative but also showcase the versatility of onigiri.
For more inspiration, check out this guide to onigiri variations for even more creative filling ideas!
Cooking Tips and Notes for Spicy Tuna Onigiri
Preventing Sticky Rice – Quick Tips
To achieve perfectly cooked sushi rice for your spicy tuna onigiri, rinsing the rice is crucial. Rinse it until the water runs clear, which helps eliminate excess starch. Additionally, using a rice cooker can ensure consistent results. If cooking on the stove, let the rice sit covered for 10 minutes after cooking—this allows steam to finish the process and can help avoid stickiness.
Best Practices for Shaping Your Onigiri
Shaping spicy tuna onigiri can be tricky, but it’s all about gentle pressure. Moisten your hands to prevent sticking and lightly sprinkle them with salt for flavor. When forming your rice ball, use an oblong shape and be sure to encase the filling completely. Rotate the ball as you press to create a nice triangular form without compressing it too tightly; this keeps the rice fluffy and delicious!
For more tips, check out resources on Japanese cuisine here and here for authentic recipes and insights!
Serving Suggestions for Spicy Tuna Onigiri
Pairing Onigiri with Dipping Sauces
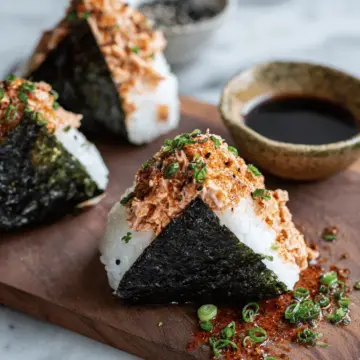
Elevate your spicy tuna onigiri by pairing it with flavorful dipping sauces. Consider serving it alongside a zesty soy sauce, or a creamy wasabi mayonnaise for an extra kick. You might also love a drizzle of sesame dressing—its nutty flavor complements the spiciness of the filling beautifully. Feel free to get creative and mix a touch of sriracha with soy sauce for a delightful twist!
Perfect Sides for a Complete Meal
To make your meal truly fulfilling, consider adding fresh vegetable sides. Crunchy pickled cucumbers or a simple seaweed salad will lighten the palate and balance the richness of the onigiri. If you're looking for something heartier, try pairing with miso soup or edamame for a wholesome Japanese-inspired spread. Trust me, these sides perfectly complement the savory goodness of your spicy tuna onigiri!
Time Breakdown for Spicy Tuna Onigiri
Preparation Time
This delightful spicy tuna onigiri takes about 20 minutes to prep, giving you enough time to get all your ingredients ready while enjoying a little music or a podcast.
Cooking Time
The cooking aspect requires around 30 minutes. This includes the time it takes to perfectly steam the sushi rice, ensuring that it reaches that ideal fluffy texture.
Total Time
In just 50 minutes, you’ll have a batch of spicy tuna onigiri ready to impress friends or family! Whether as a snack or a meal, your taste buds will thank you.
For more tips on rice preparation and shaping techniques, check out Serious Eats, a fantastic resource for mastering cooking essentials.
Nutritional Facts for Spicy Tuna Onigiri
If you're curious about the nutritional profile of these delightful spicy tuna onigiri rice balls, here’s a quick breakdown:
Calories
Each serving of spicy tuna onigiri contains approximately 250 calories, making it a satisfying yet light option for a meal or snack.
Protein
You'll benefit from about 10 grams of protein per serving, thanks mainly to the tuna, which is a fantastic source of lean protein and essential amino acids.
Carbohydrates
Lastly, enjoy about 41 grams of carbohydrates in each onigiri. This includes the rice, providing you with the energy needed to power through your day.
For more detailed nutritional insights, the U.S. Department of Agriculture offers extensive resources on food nutrition, which might pique your interest!
FAQs about Spicy Tuna Onigiri
Can I use other types of fish for Onigiri?
Absolutely! While spicy tuna onigiri is a classic favorite, you can experiment with other seafood like salmon or even shrimp. Just make sure to season it in a similar way to keep that delicious flavor profile intact. Don’t shy away from using canned fish like salmon or mackerel—these can also make delightful fillings!
What is the best way to store leftover Onigiri?
If you have extra spicy tuna onigiri, store them in an airtight container in the fridge for up to 2 days. To keep the rice from getting too hard, it's best to wrap them in plastic wrap. Alternatively, you can freeze them for later enjoyment! Just ensure to defrost them overnight in the fridge before eating.
How can I make my filling spicier?
To enhance the kick in your spicy tuna onigiri, you can add more sriracha or incorporate chili oil. For an extra burst of flavor, consider adding diced jalapeños or even a hint of wasabi to the filling. Remember, spice is subjective, so tailor it to your taste!
For more tips and ideas, check out resources like the Japanese Cooking 101 for delicious variations.
Conclusion on Spicy Tuna Onigiri
In conclusion, making spicy tuna onigiri at home is a delightful and accessible culinary adventure. With simple ingredients and steps, you can create a flavorful snack or light meal that captures the essence of Japanese comfort food. Enjoy this treat fresh, and share with friends for a memorable experience!
Spicy Tuna Onigiri
Equipment
- Rice cooker
- Fine-meshed sieve
- medium bowl
- Non-stick saucepan
- Rice paddle
Ingredients
- 1.5 cups Japanese short-grain rice about 2 rice cooker cups
- 15 fluid ounces cold water
- kosher salt
- 1 (4.5-ounce) can Portofino Solid Albacore Tuna in Extra Virgin Olive Oil drained
- 1.5 tablespoons mayonnaise
- 1 teaspoon sriracha hot sauce
- 0.5 teaspoon rice vinegar
- 1 scallion green parts only, finely sliced
- toasted black sesame seeds for sprinkling (optional)
- 3 sheets toasted nori cut crosswise in half
Instructions
- Prepare the rice: Place the rice in a fine-meshed sieve and rinse well under cold water, rubbing the grains of rice between your fingers, until the water runs clear. This helps remove any excess starch and improves the texture of the rice once cooked. Drain well.
- Combine the rice and water, and cook in a rice cooker according to the manufacturer’s directions. If you do not own a rice cooker, combine the rice and water in a medium (non-stick, if possible) saucepan. Bring to a boil, reduce heat to low, and cook covered for 16 to 18 minutes or until the water has been completely absorbed. Remove from heat, gently fluff the rice with a rice paddle or wooden spoon, place a clean kitchen towel over the pot, top with the lid again, and let stand covered for 10 minutes. While the rice cools slightly, prepare the onigiri filling.
- Make the filling: In a medium bowl, combine the albacore tuna, mayonnaise, hot sauce, and rice vinegar with a fork until evenly combined. Stir in the scallions.
- Assemble: Set aside a medium bowl of room temperature water and a small bowl of kosher salt for pinching. Once the sushi rice is cool enough to handle, start assembling the onigiri by hand.
- Lightly moisten your hands by dipping them in the water bowl. Sprinkle both of your palms lightly with kosher salt and rub them together. Grab roughly a ½ cup of sushi rice and gently press into a thick oblong shape in one palm of your hand. Add a tablespoon of the tuna filling, pinched together with your fingertips, to the center of the rice and close the rice over the filling.
- Gently shape the rice ball into a wide triangular shape using the palms of one hand and the fingers of your other hand, rotating the rice ball as you go. Avoid compressing the rice too hard, it should hold together well but be lightly packed. Sprinkle the outside of the onigiri with black sesame seeds. Wrap each onigiri in a nori sheet and place an additional small spoonful of tuna filling on the top of each onigiri. Serve immediately.


Leave a Reply