
Introduction to Banana Pudding Cheesecake
When you think of comfort food, few desserts can compete with the exquisite combination of flavors in Banana Pudding Cheesecake. This delightful creation takes the beloved classic banana pudding and reimagines it as a luscious cheesecake, making it a dreamy treat for any occasion.
Why Banana Pudding Cheesecake is the Ultimate Comfort Food
Imagine sinking your fork into a creamy slice that has the familiar taste of ripe bananas and the subtle crunch of vanilla wafers, all resting on a buttery graham cracker crust. It’s truly an experience! The smooth texture of the cheesecake pairs perfectly with the nostalgic flavors of banana pudding, enough to transport you back to your childhood.
Beyond its flavor, there’s something incredibly satisfying about sharing a cheesecake with friends or family during gatherings. This dessert not only tastes good but also brings people together, creating lasting memories around the table. According to a study on comfort foods, desserts with familiar flavors are known to boost mood and evoke happiness, making Banana Pudding Cheesecake the perfect indulgence for a cozy night in or a lively party.
If you're curious about how to master this delicious dessert, keep reading for an easy-to-follow recipe that’s sure to impress!
Ingredients for Banana Pudding Cheesecake
Crafting the perfect Banana Pudding Cheesecake may seem daunting at first, but gathering your ingredients can be simple and enjoyable! Let’s break down what you'll need for this delightful dessert.
Essential Ingredients for the Cheesecake
To create a rich and creamy cheesecake base, you’ll need:
- 2 (8 ounce) blocks cream cheese, softened to room temperature for easy mixing.
- ½ cup sugar to sweeten the batter just right.
- 2 large eggs, which help bind the ingredients and add structure.
- 3.4 ounce box banana cream instant pudding for that unmistakable banana flavor.
- 15 vanilla wafers, crushed to add delightful texture.
- 1 store-bought 10-inch graham cracker crust for a hassle-free base.
These essentials will set you on the path to cheesecake success!
Optional Ingredients for Extra Flavor
Want to elevate your Banana Pudding Cheesecake? Consider adding these optional ingredients:
- Fresh banana slices on top for a burst of freshness.
- A dollop of whipped cream, adding fluff and richness.
- A drizzle of caramel or chocolate sauce for a sweet finish that can impress guests.
You can even check out Food Network for more pro tips on enhancing flavors! Adventure awaits in your kitchen, so get ready to whip up this delicious treat!
Preparing Banana Pudding Cheesecake
Making a Banana Pudding Cheesecake is a delightful way to elevate two beloved treats into one luscious dessert. Let’s walk through the steps to ensure your cheesecake turns out perfect, whether it's for a gathering or just a special night in.
Step 1: Gather Your Ingredients
Before diving into the mixing and baking, it’s essential to gather all your ingredients to ensure a smooth process. For your Banana Pudding Cheesecake, you'll need:
- 2 (8-ounce) blocks of cream cheese, softened to room temperature
- ½ cup sugar
- 2 large eggs
- 1 (3.4 ounce) box of banana cream instant pudding
- 15 vanilla wafers for that crunchy texture
- 1 store-bought 10-inch graham cracker crust (the basic type works great!)
Preparing all these ingredients in advance can really save you time in the kitchen!
Step 2: Cream the Cheese and Sugar
Start by preheating your oven to 300°F (149°C). In a bowl, combine the softened cream cheese and sugar. Using a stand mixer or a handheld electric mixer, blend them together on medium speed for about 2 minutes until the mixture is smooth and creamy. This step is crucial, as it sets the foundation for your cheesecake's texture—no one wants a lumpy cheesecake!
Step 3: Incorporate Eggs and Pudding Mix
Next up, add the eggs one at a time, mixing until they’re just incorporated. Then, it’s time for the star of the show—the banana cream instant pudding. Sprinkle the pudding mix into the cream cheese mixture. Remember to scrape down the sides of the bowl frequently to ensure everything is combined well.
Step 4: Prepare the Vanilla Wafers
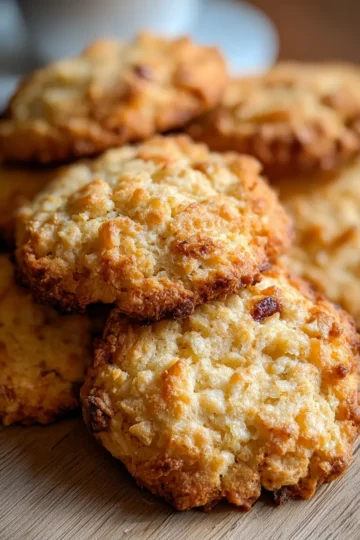
Now, for the fun part! Place the vanilla wafers in a resealable bag and crush them with your hands or a rolling pin. Aim for a chunky consistency, so you get delightful little bits of wafer throughout your cheesecake. These bits provide a wonderful texture contrast against the creamy filling.
Step 5: Combine and Bake the Cheesecake
Gently fold the crushed wafers into the cheesecake batter. Carefully spread the combined mixture into your graham cracker crust. Bake your cheesecake in the preheated oven for about 55 to 60 minutes. Don’t worry if it puffs up a bit while baking; it will settle as it cools.
Step 6: Cool and Chill Before Serving
Once baked, let your Banana Pudding Cheesecake cool at room temperature. After that, refrigerate it for at least a few hours—or even overnight—before serving. This chilling time enhances the flavors and ensures a firmer texture, making it easier to slice and serve.
And voilà! You’ve created a decadent Banana Pudding Cheesecake that’s sure to impress without overwhelming you. Happy baking!
Variations on Banana Pudding Cheesecake
Banana Cream Cheesecake with Chocolate Swirls
If you're a fan of both banana pudding and chocolate, this Banana Cream Cheesecake with Chocolate Swirls is the perfect twist for you! Simply melt some chocolate and swirl it into the cheesecake batter before baking. The combination of the creamy banana flavor with the rich chocolate creates an indulgent dessert that’s sure to impress. You can also top it off with some chocolate shavings or slices of banana for added flair!
Gluten-Free Banana Pudding Cheesecake
For a gluten-free option, swap out the traditional graham cracker crust for a gluten-free crust or even ground almonds. Trust me, it’s just as delicious! This Gluten-Free Banana Pudding Cheesecake still retains all the creamy goodness and those delightful vanilla wafer chunks, making it a crowd-pleaser for everyone, regardless of dietary needs. Let your friends know they can enjoy a tasty dessert without missing out!
For more tips on creating flavorful, diet-friendly desserts, check out resources from The Gluten-Free Baker and Dessert for Two.
Cooking Tips and Notes for Banana Pudding Cheesecake
Selecting the Right Cream Cheese
To achieve the perfect Banana Pudding Cheesecake, opt for full-fat cream cheese. Look for brands that are labeled “brick” cream cheese, as they have less moisture compared to spreadable versions. Softening to room temperature is key; this ensures a smoother batter and less chance of lumps. You can use an electric mixer, but mixing by hand is also a great way to control texture.
Avoiding Cracks in the Cheesecake
Cracks can be a common issue, but they can be easily avoided! Make sure you don’t whip too much air into the batter—mix just until combined. Baking at a lower temperature (300°F) helps prevent rapid rising, which can lead to cracking as the cheesecake cools. Also, allow your Banana Pudding Cheesecake to cool slowly in the oven with the door ajar for a smoother surface. A water bath is another great option to maintain moisture throughout baking.
Serving Suggestions for Banana Pudding Cheesecake
Stylish Presentation Ideas
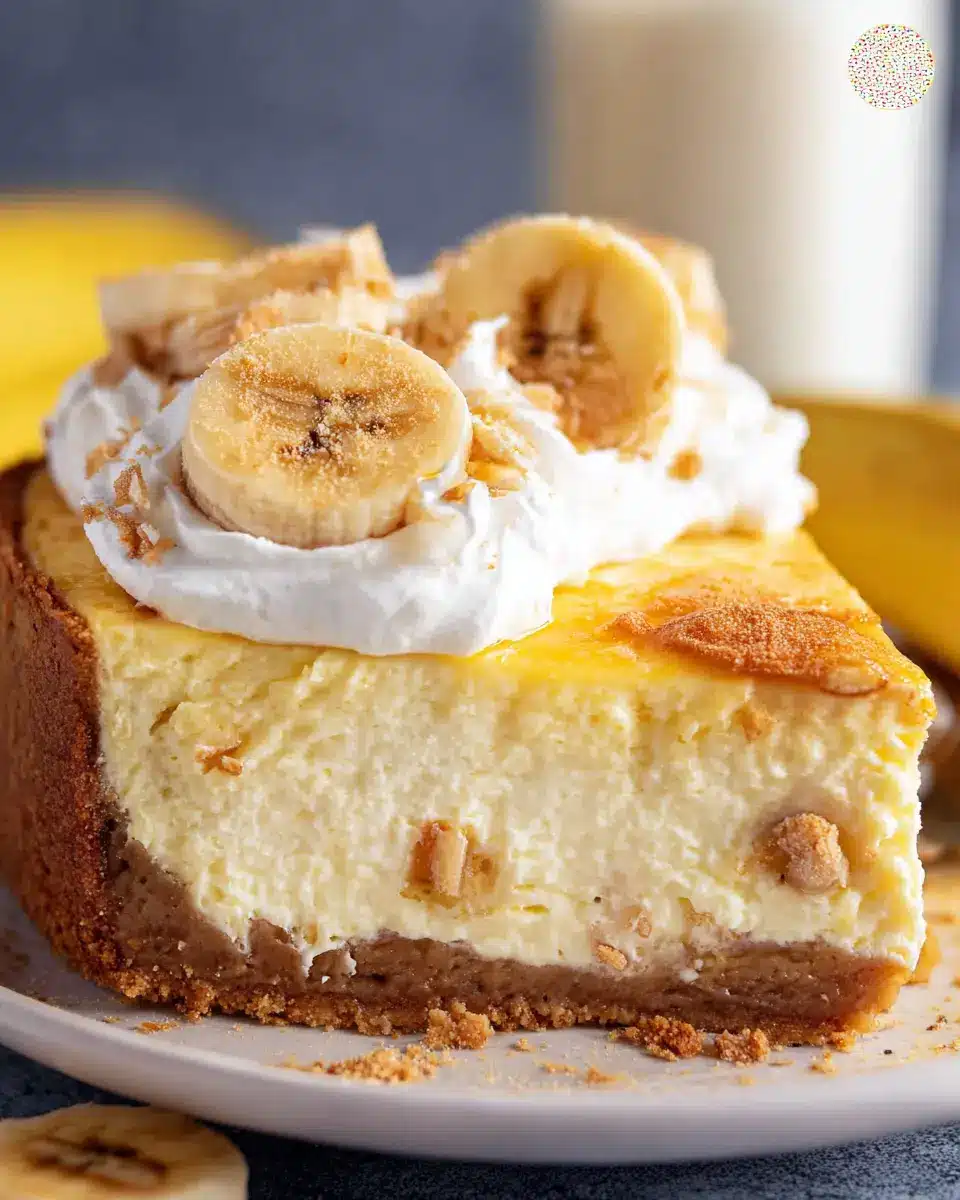
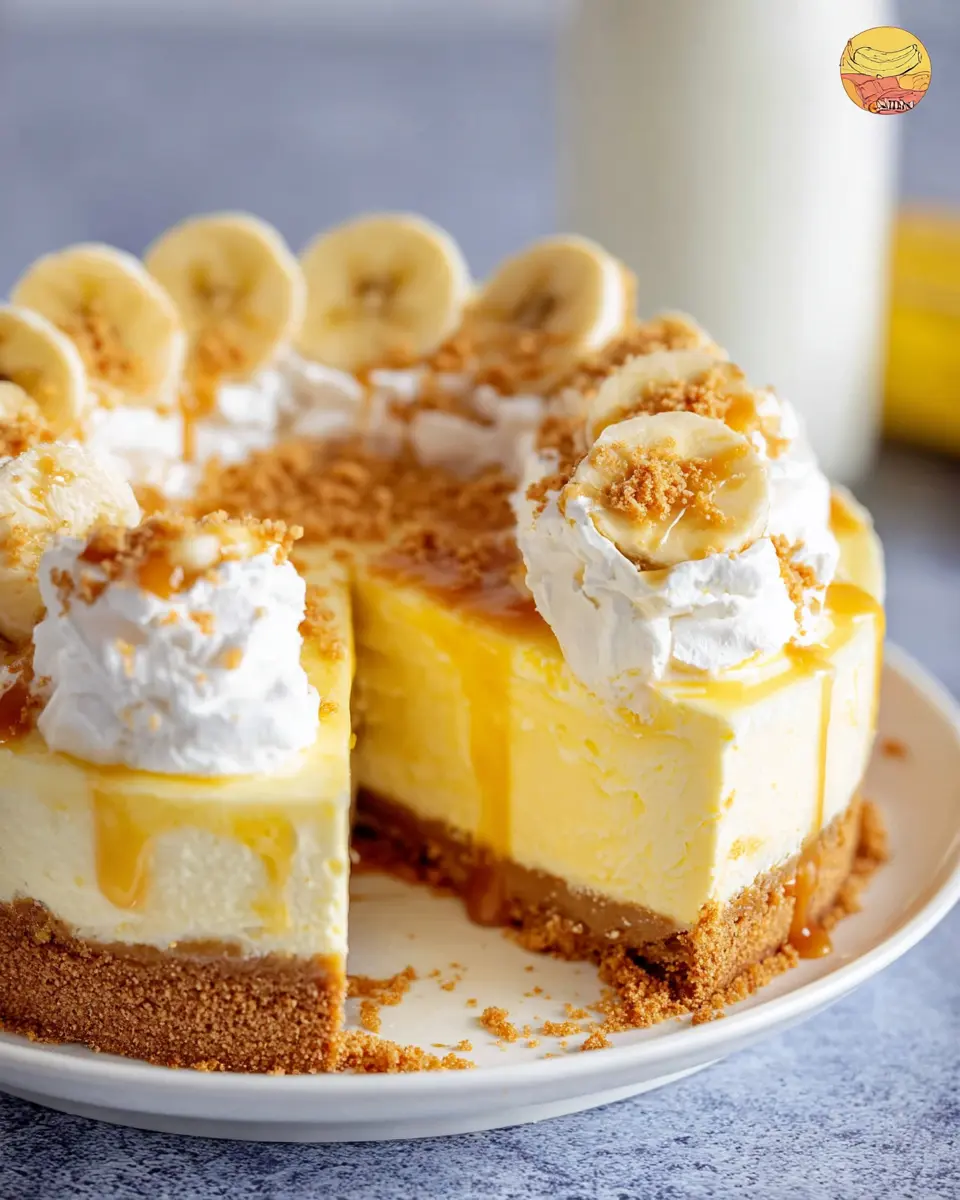
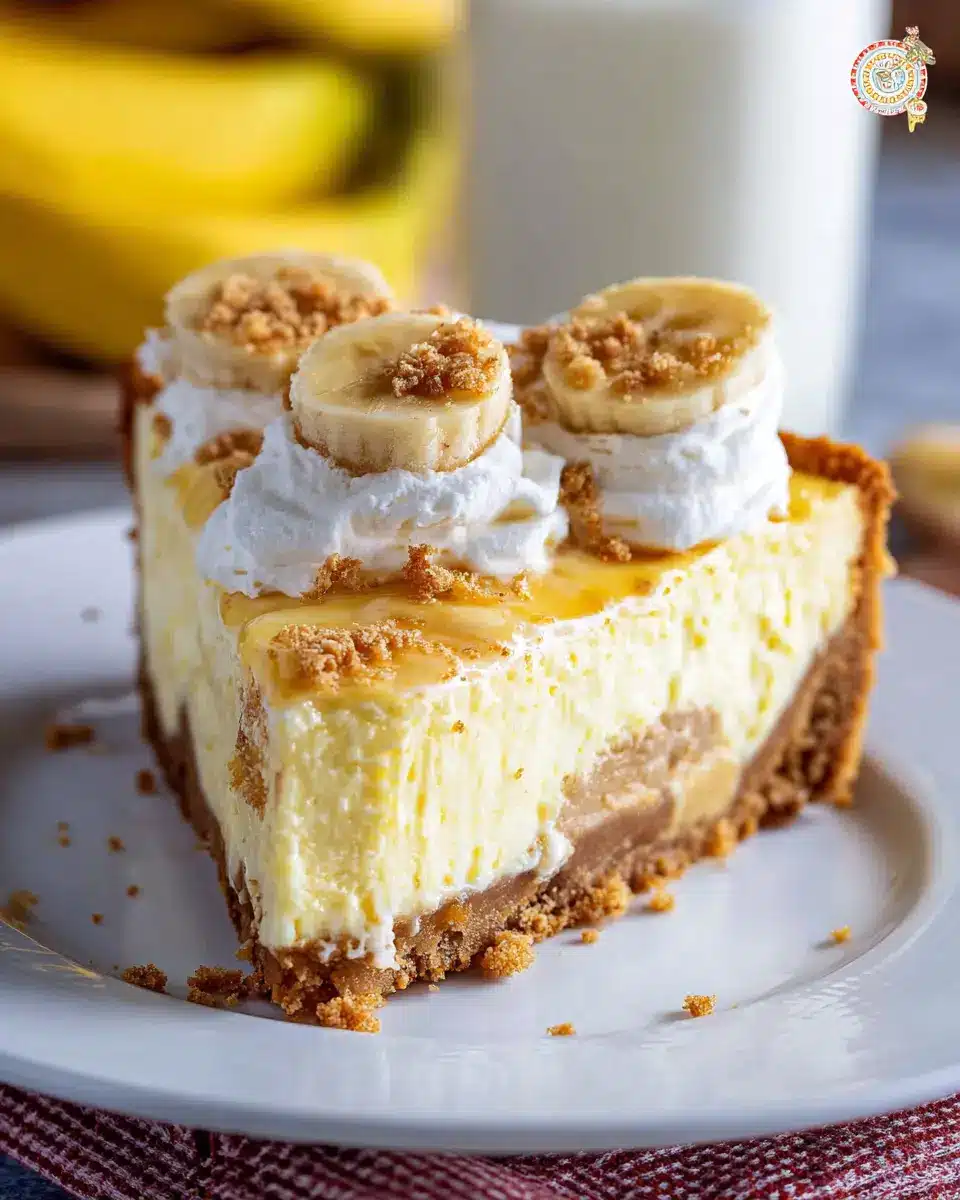
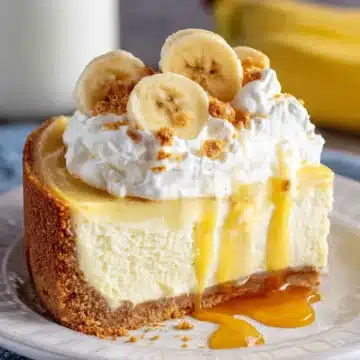
For a delightful presentation of your Banana Pudding Cheesecake, consider topping it with freshly sliced bananas and a sprinkle of crushed vanilla wafers. To elevate the look, use a piping bag to add dollops of whipped cream around the edge before serving. You can also layer individual portions in glasses for a fun twist that makes each serving feel special. A drizzle of caramel sauce or a dusting of powdered sugar will not only enhance the flavors but also make your dessert visually appealing.
Pairing Suggestions for a Balanced Meal
To create a well-rounded dining experience, pair your Banana Pudding Cheesecake with light proteins and fresh salads. Grilled chicken or some turkey bacon can serve as a satisfying contrast to the sweetness of the dessert. Additionally, a crisp green salad, perhaps with vinaigrette, can cleanse the palate and complement the rich flavors of the cheesecake. For drinks, opt for iced tea or a refreshing lemon soda, which offers a zesty kick that pairs beautifully with the cheesecake's creamy texture.
For more presentation ideas, check out Butter, Be Ready or explore other dessert pairings on The Kitchn.
Time Breakdown for Banana Pudding Cheesecake
When diving into the world of Banana Pudding Cheesecake, it's essential to know how to allocate your time. Here's a quick breakdown to help you plan your baking adventure:
Preparation Time
Expect to spend about 10 minutes preparing your ingredients and mixing everything together. This is the fun part where you get to blend creamy cheese with delicious banana flavors!
Baking Time
Your cheesecake will bask in the oven for approximately 55 to 60 minutes. Keep an eye on it—when it puffs up, it's almost ready!
Cooling and Chilling Time
Once baked, allow your Banana Pudding Cheesecake to cool for several hours in the fridge. Patience is key here, as chilling helps the flavors meld and sets the perfect texture. Aim for at least 4 hours for the ultimate indulgence!
For more tips on perfecting your cheesecake experience, check out The Kitchn's cheesecake guide.
Nutritional Facts for Banana Pudding Cheesecake
When indulging in our delightful Banana Pudding Cheesecake, it’s good to know what you’re biting into, right? Here’s a quick breakdown of the nutrition:
Calories
Each slice contains approximately 616 calories, making it a rich dessert option perfect for special occasions.
Carbohydrates
You’ll find around 73 grams of carbohydrates per serving. This includes the deliciously sweet layers that make every bite satisfying.
Sugars
With roughly 50 grams of sugar, this cheesecake is undeniably sweet, offering that comforting flavor we all love in a classic banana pudding dessert.
For more detailed nutrition insights, check out resources like the USDA FoodData Central to explore the nutritional profiles of other ingredients you may use!
FAQs about Banana Pudding Cheesecake
Can I make this cheesecake ahead of time?
Absolutely! Making your Banana Pudding Cheesecake a day in advance can enhance its flavors. Just ensure you refrigerate it properly after baking to allow it to set. The richer flavors will surprise you when it's time to serve.
What can I substitute for vanilla wafers?
If you can't find vanilla wafers or prefer something different, you can use crushed graham crackers or even shortbread cookies. Both will provide a delightful crunch and complement the creamy filling beautifully. For a healthier twist, consider using almond or coconut-flavored alternatives.
How do I know when my cheesecake is done baking?
A perfectly baked Banana Pudding Cheesecake will be slightly puffy and will jiggle just a bit in the center. If you insert a toothpick, it should come out with a few moist crumbs, not wet batter. It’s essential to let it cool before placing it in the fridge, as it will firm up as it chills.
For more tips and cheesecake variations, check out this resource on cheesecake baking.
Conclusion on Banana Pudding Cheesecake
In summary, this Banana Pudding Cheesecake is a delightful twist on a classic dessert, combining the creamy richness of cheesecake with the nostalgic flavors of banana pudding. Perfect for gatherings or a cozy night in, this cheesecake will surely impress your family and friends. Enjoy every slice!
Banana Pudding Cheesecake
Equipment
- Stand Mixer
- handheld electric mixer
- 9-inch pie dish
Ingredients
Cheesecake Mixture
- 2 blocks cream cheese, softened 8 oz each
- ½ cup sugar
- 2 large eggs
- 3.4 ounce banana cream instant pudding powdered
Crust and Toppings
- 15 units vanilla wafers crushed, leave some chunky
- 1 store-bought 10-inch graham cracker crust extra servings size
Instructions
Preparation
- Preheat oven to 300°F degrees.
- Combine cream cheese and sugar in a stand mixer until smooth (about 2 minutes on medium speed).
- Add eggs and mix until combined.
- Add banana cream pudding to the mixture and mix until combined. The batter will be thick.
- Crush vanilla wafers in a ziploc bag, leaving some chunky.
- Fold the crushed wafers into the cheesecake batter.
- Spread batter into the graham cracker crust. Bake for about 55-60 minutes.
- Allow the cheesecake to cool in the fridge for several hours before serving.
Leave a Reply